Showing posts with label cheese. Show all posts

Sunday, June 30, 2013

Italian Mozzarella Stuffed Arancini

I'm going to be perfectly honest with you here.....when I made the Italian Mozzarella Stuffed Arancini last week, I was expecting them to be a little bit average.

I mean don't get me wrong, I thought they would be lovely, but I was kind of thinking they might be a little bit bland and altogether un-blog-worthy.....

As it turns out, they were incredible.

My previous favourite caramelised onion risotto ball recipe has been cast aside in shame and replaced with these little flavour packed babies.

But I have to admit, in my pre-dinner non-believer state....I didn't take a photo of them. But earlier that week  I did get this photo of the super moon through Mr B's telescope so I figure that pretty much makes us even.....


To make these Italian Arancini you will need:

1 tbspn oil
3 cups of chicken stock
3/4 cup arborio rice
1 onion, diced
1 tspn crushed garlic
1 tbspn Gourmet Garden Italian Herbs
1/3 tspn chilli
200g Mozzarella (cut into 12 cubes)
1/2 cup grated parmesan
1 tbspn butter
1 cup panko breadcrumbs

To begin we need to make our risotto. This is best done the night before as it needs to spend some time chilling out in the fridge.

Heat oil in a fry pan over medium high heat. Add onion and cook for 3-5 mins.

Add the garlic and cook for a further 2-3 mins.

Add the rice and stir to combine.

Add 1 cup of stock and cook until absorbed. Repeat with remaining 2 cups of stock. This should take around 15-20 mins. The rice should be tender, but still firm to bite. If the rice is not yet cooked, add another 1/2 - 3/4 cup of water and cook until absorbed.

Stir through the chilli, herbs, parmesan and butter. Season with salt and pepper. Spoon the mixture into a bowl and allow to cool in the fridge overnight.

To assemble your arancini you will need to begin by pre-heating the oven to 160C.

Form tablespoons of the risotto mixture into a ball and press a cube of mozzarella into the middle. Ensure the mozzarella is completely covered by the risotto or it will leak out during cooking.

Roll the arancini in the panko breadcrumbs and place on a greased oven tray. Lightly drizzle with oil and bake for 15-10 mins or until crisp and golden.

Serve with salad and steamed vegetables.

Enjoy!!

Mrs B xx

Sunday, June 16, 2013

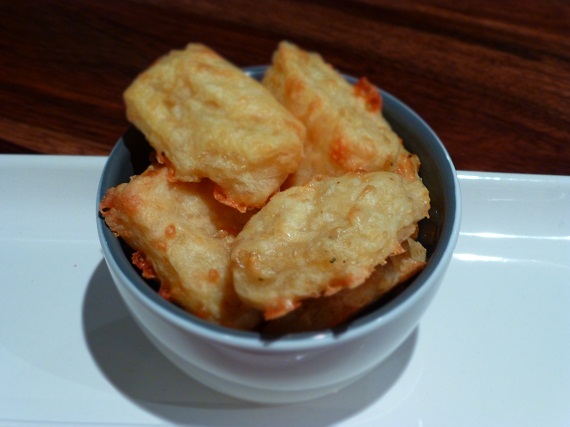
Oven Baked Mozzarella Sticks

When I was younger Saturday nights at home were a smorgasbord of indulgence. We used to have deep fried mozzarella sticks with deep fried banana, prawn crackers and for dessert, a deep fried tim tam! Now I know your thinking that is alot of deep fried going on right there, but we were a healthy family the rest of the time and this was our night to live on the wild / fried side. Mum and Dad also used to have deep fried zucchini and deep fried camembert but when I was little I a) didn't do greenery and b) didn't do camembert....if only I could go back and have a word with myself!

Anyway, I remember 'Camembert Nights' as being a bit of an event, Mum would be in the kitchen preparing most of the morning, I would spend most of the afternoon trying to pinch little bits of the crumb mix from the fridge and that night we would feast. I would get to spend the night in my room watching tv, listening to music and reading till all hours of the morning and Mum and Dad would have some time out for themselves.

It has been years since I've had cheese sticks or prawn crackers or a deep fried banana for that matter and the one time I saw a shop selling deep fried tim tams and dragged Mr B in there with stories of my youth and how he simply had to try one....well let's just say he hasn't forgiven me yet.

Mr B and I own a deep fryer but we rarely use it.....partially due to the whole trying to be healthy thing and partially due to the fact it's a pain to clean up. Last week we had some leftover mozzarella floating around in the fridge and I decided to try making some cheese sticks and baking them in the oven. They were an absolute success, not quite as good as my Mum's but delicious none the less.....now I just need to try it with a tim tam!


For these Oven Baked Mozzarella Sticks you will need:

300g Mozzarella cut into sticks (we cut ours into 4 and then cut each one in half to make 8 nice sized sticks)
2 eggs
1 cup panko breadcrumbs
1/2 cup plain flour
Seasoning (we used 1/2 tspn cajun spices on half and 1/2 tspn lemon pepper on the other but you can use italian herbs or whatever you want really)

In small bowl, whisk the eggs. Place the flour in a small bowl and place the panko breadcrumbs and your chosen seasoning into another small bowl.

Roll the cheese sticks in flour, shaking off excess. Then dip into the egg and roll in the crumbs to coat. Dip the cheese in the egg again and then roll in the crumbs again and then place on a plate. Repeat with your remaining cheese sticks.

Place the plate of cheese sticks into the freezer and pre-heat your oven to 200C. Lightly grease a baking tray with oil.

Once the oven is pre-heated, remove the cheese sticks from the freezer and place onto the tray. Drizzle with a little more oil.

Place the tray on the bottom shelf of your oven and bake for 4-5 mins. Turn the cheese sticks and bake for a further 5 mins. Keep a close eye on them to make sure they don't melt. I turned mine at the half way point and they were perfect but when I went back 5 mins later, half of them had pockets of mozzarella oozing out of them which really doesn't matter, they still taste delicious!

Serve as an entree, part of a tapas dinner or as a main meal with salad.


Enjoy!!

Mrs B xx

Friday, June 14, 2013

Caramelised Onion, Mushroom and Gouda Toasted Sandwich

Everyone loves a good toasted sandwich.

In our house the usual go to combination is cheese and chutney or cheese, ham and tomato.....personally I am quite partial to cheese, tomato and tuna or cheese and vegetarian sausages but Mr B has never been thrilled with either of those ideas.

Seriously I only just managed to convince him to make my all time favourite cheese and vegetarian sausage special when I was recovering from surgery a few weeks ago  and I am 100% confident that if I hadn't just undergone surgery 3 hours prior, he would have screwed his nose up and refused.

For the record - it was an awesome sandwich.

Toasted sandwiches are usually our go to easy dinner or occasionally our go to 'I'm starving' lunch, but never before have we ventured into mushroom toasted sandwich territory. It was an argument I just wouldn't win. So when Mum and Dad came for tea this week, I made these Caramelised Onion, Mushroom and Gouda Toasted Sandwiches and they were a hit, even Mr B loved them!


Caramelised Onion, Mushroom and Gouda Toasted Sandwiches - Makes 4 sandwiches

8 slices bread
400g mushrooms, thinly sliced
2 onions, diced
Balsamic Vinegar
2 tbspns olive oil
Salt and Pepper
8 slices gouda cheese

Pre-heat oven to 200C.

Combine the mushrooms and onions in an oven dish. Season with salt and pepper and drizzle with balsamic vinegar and olive oil. Mix it all up and place in the oven until the onions are nice and caramelised. It took about an hour in my oven but I suggest checking it regularly.

Once the mushrooms and onions are done to your liking, you can assemble your sandwiches. Pre-heat your sandwich press (or melt 1 tbspn of butter in a fry pan) Take one piece of bread, top with a slice of gouda followed by a quarter of the mushroom mix and finishing off with a slice of gouda. Top with the final piece of bread. Repeat with remaining mushroom mixture and bread.

Place the sandwiches in the sandwich press (or fry pan) and cook for 3-5 mins or until golden.

Serve with salad.

Enjoy!

Mrs B xx

Tuesday, June 11, 2013

Tiramisu Chocolate Ripple Cake with Homemade Mascarpone

Don't you just love it when an idea comes together?

Some weeks I sit and pore over my recipe folders for hours on end trying to come up with a menu for the following week and absolutely nothing takes my fancy.

Sometimes I look through them and have so many ideas I don't know what to cook first.

But when I stumbled across a recipe for home made mascarpone I knew exactly what I wanted to do with it.

For as long as I can remember my Mum has been talking about Chocolate Ripple Cake and how she has never tried or made one. Personally I have to leave the room when we go to Mr B's Mothers house and there is Chocolate Ripple Cake for fear of inhaling it all, but I too have never made one myself.

I think the reason I have never made one before was because the average Chocolate Ripple Cake, whilst delicious, just didn't really excite me enough to make my own.....plus I was always slightly unsure about which direction to stack the biscuits up....

With this in mind I a) found a recipe that told me which way to stack the biscuits and b) set about re-creating one of my favourite desserts in Chocolate Ripple Cake form.


Now you certainly don't have to make your own mascarpone, but I always tend to ignore recipes that use it due to the ridiculously high price of buying it in the shops. This recipe here is not only unbelievably simple, but it will cost you next to nothing and did I mention the end result is a rich and creamy mascarpone that you will be super pleased about because you have created it all on your own!

Homemade Mascarpone

2 cups thickened cream (full fat and not ultra homogenised so not long life)
1 tbspn lemon juice
1 candy thermometer
cheese cloth / butter muslin

In a saucepan over medium heat, slowly bring the cream up to 88C, stirring constantly to ensure it doesn't scald.

Once it reaches 88C, add the lemon juice and whisk for 5 mins while maintaining the temperature.

Remove from the heat and allow the mixture to cool for 35-45 mins.

Line a colander or sieve with the cheese cloth / butter muslin and place over a large bowl - try and double it over so you have at least 2-3 layers. Pour the cream mixture into the muslin and place in the fridge for at least 12 hours (preferably 18-24). Scoop the mascarpone into a container or jar and discard the whey (there will only be 2-3 tbspns anyway).

Store in the fridge for up to a week. Not that it will last that long because we are going to use it all to make this Tiramisu Chocolate Ripple Cake!


Tiramisu Chocolate Ripple Cake

1 x 250g pkt of Chocolate Ripple Biscuits
2 cups Mascarpone
300ml thickened cream
1 tspn vanilla essence
2 tbspns icing sugar
1/4 cup strongly brewed black coffee

Combine the mascarpone, cream, vanilla and icing sugar in a bowl. Beat until mixture is thick. Place in the fridge for an hour.

Take your serving plate and smear 1-2 tbspns of the mascarpone mixture in a rectangle shape.

Take one of your biscuits and brush with the coffee mixture. Place 1 tspn of the cream mixture onto the biscuit and stand up on the plate. Repeat with remaining biscuits, coffee and cream to make a row. Continue this process to make 4-5 rows.

Spread the remaining cream mixture over the cake. Chill overnight to set. Serve dusted with chocolate powder.


Holy heck this cake was good. Like awesome good.

I was really impressed with how this came out and truth be told, prefer it to the traditional versions of both Chocolate Ripple Cake and Tiramisu. The biscuits had gone beautiful and soft, the subtle coffee flavour had made it's way into the cream....and the cream....oh I could eat it by the truck load.

Now if you will excuse me, I have a small piece hidden in the back of the fridge and I plan on demolishing it before Mr B finds it!

Enjoy!

Mrs B xx

Thursday, May 30, 2013

Homemade Feta Cheese and Feta, Ricotta and Spinach Rolls

A few weeks ago, Mr B and I made our own feta cheese using our Mad Millie Cheese Kit. It never ceases to amaze me how simple cheese making is. Yes it is a little time consuming but absolutely worth it when you taste the finished product.

That there is 1kg of feta cheese.....


We cut most of it up into 200g slices and placed it in some brine in the fridge. But when we tried it a few hours later it was super salty so we soaked it in some milk for an hour and hey-presto it was perfect.


We cut the rest of it up into small cubes and placed it in a jar full of basil infused olive oil. I can't wait to try this one later on!


As you can imagine, this week we have been going feta crazy....feta stuffed omelettes, potted eggs topped with feta and last night's instalment, Feta, Ricotta and Spinach Rolls. I was a little worried these might lack flavour and desperately wanted to add some parmesan....so glad Mr B stopped me because they were amazing!

To make these Feta, Ricotta and Spinach Rolls you will need:

200g feta cheese
100g ricotta cheese
250g frozen spinach
2 sheets puff pastry
1 egg, beaten
2 tbspns milk

Grease a baking tray and pre-hat oven to 180C.

De-frost the spinach in the fridge overnight. Try and squeeze out as much moisture as possible.

Combine the feta, ricotta and spinach in a bowl and season with salt and pepper.

Cut the puff pastry sheets into quarters.

Place tablespoons of the filling along one edge of each pastry square and roll up to enclose.

Combine the egg and milk and brush over the pastry.

Bake for 20-25 mins or until puffed and golden.


And look at these gorgeous pink carnations Mum and Dad brought me last night- three bunches of flowers in one week has to be a new record!


Mrs B xx

Saturday, May 25, 2013

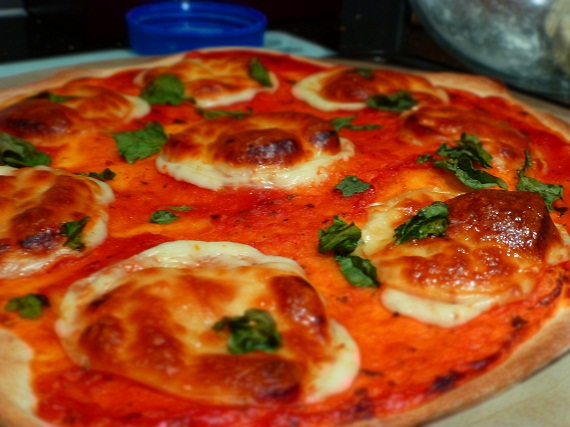
Home Made Caprese Pizza with Cheesy Garlic Bread


24 hours after day surgery and here I am, back on deck. Well technically I'm back on the couch but I'm up and about at least. Everything went well yesterday. I won't have the actual results of the surgery until I go back to my specialist next week, but the big thing for me is that it is over and done with. Spending half of the day waiting to be called to theatre and then the other half desperately trying to shake off that groggy fuzzy headed feeling is not pleasant. I was so happy and relieved to get home and just curl up with Mr B, who I have to say is taking such good care of me, always making sure my heat pack is hot and making sure I have everything I need.


It's hard to believe that this time last year we were coming towards the end of our European Honeymoon. I think right about now we would have been in Paris.....

Over the last few weeks we have been re-living our trip by reading our travel diary each night and looking at all of our photos, but we have also been trying to re-create some of our favourite meals from when we were away.

When we were in Italy I fell head over heels in love with the Caprese Salad, the combination of fresh mozzarella, tomato and basil just blew my mind and we both became more than a little partial to a thin and crispy pizza so what better way to reminisce than by making our own Thin and Crispy Caprese Pizza and serve it with a side of Cheesy Garlic Bread?


Now I know the idea of making your own pizza dough can freak alot of people out but stay with me here. This recipe is really simple and makes two large pizzas and apart from a little bit of kneading here and there, you pretty much just throw everything in a bowl!

To make the pizza dough you will need:

1.5 cups plain flour
1 tspn yeast
1 tspn caster sugar
1 tspn table salt
1 tbspn olive oil (we used a basil infused olive oil which I would absolutely recommend if you can find it!)
1/2 cup warm water

Combine the flour, yeast, sugar and salt in a medium bowl and make a well in the centre. Add the oil and enough water to make a soft dough. Knead for 10 mins or until smooth and elastic.

Place the dough a in large oiled bowl, cover and leave in a warm place for 1 hour or until roughly doubled in size.

Turn the dough onto a floured surface and knead until smooth. I usually try and avoid covering my bench in flour so just knead it in the bowl!

Divide the dough in half and roll on a floured surface or between two sheets of lightly greased baking paper until it's roughly 30cm round. Don't worry if it's not a perfect round base, it will give it that rustic look!

Pre-heat oven to 240C and grease two oven or pizza trays. We use a pizza stone which we just lightly dust with flour.

Place the base on the prepared tray and top with your choice of toppings. Bake for 15 mins or until bases are browned and crisp.

For the Caprese toppings we used:

2/3 cup passata sauce
125g mozzarella, thinly sliced
1/4 cup loosely packed fresh basil.

Spread  the pizza base with passata and top with mozzarella and roughly torn basil leaves.


And seeing as we are being extra good and having a thin and crispy pizza base we deserve to splash out on the side dish right? Mr B loves this Cheese Garlic Bread and whilst it isn't for the faint hearted with all of it's butter and cheese, it was the perfect accompaniment to our pizza!

For the Cheesy Garlic Bread you will need:

1 x baguette, sliced in hallf horizontally and then in half vertically.
40g butter, softened
Crushed Garlic, to taste - I used about 3/4 tbspn because I like my garlic bread extra strong.
Salt and Pepper
Shredded Cheese

In a small bowl, combine butter and garlic and season with salt and pepper.

Spread the cut sides of the baguette with the garlic butter and place on a baking tray. Top with shredded cheese.

Bake the garlic bread with your pizzas (240C for 15 mins) and just keep an eye on it, it might only need 7-10 mins and as soon as it's golden and toasty, it's done!


Enjoy!

Mrs B xx

Saturday, May 18, 2013

Cheese Crackers

Earlier in the week, I realised Mr B was out of savoury goodies for his lunch box. I wanted to try something different to the usual pizza scrolls and cheese puffs so I set about making this recipe I had seen for Cheese Crackers. The only thing I will suggest is making a double batch....or at least be prepared to make them twice, possibly three times a week, they are that good.

You see I made the first batch on Monday night thinking they would last Mr B for the remainder of the week.

When I took them out of the oven, I gave him one to try. That was my first mistake. I only just managed to salvage enough for the following day's lunch.....the rest were eaten fresh out of the oven within about 10 minutes. In between mouthfuls he told me they were super awesome and tasted just like Cheds....

On Wednesday I made the second batch and stood guard in the kitchen until they had cooled enough to be hidden right up the back of the cupboard. So far so good....


To make these Cheese Crackers you will need:

60g butter, softened
1/2 tspn salt
2 cups grated cheese
1 cup plain flour
3 tbspns water

Combine the butter, salt and cheese in a bowl.

Add the flour and mix well.

Slowly add the water, 1 tbspn at a time. Mix well after each addition. When the dough forms a soft ball, it's done. Place in the fridge for 30 mins.

Pre-heat oven to 180C. Line and grease two baking trays with baking paper.

Divide the dough into 2 portions. Roll each portion out between 2 pieces of baking paper until it is 1/8 of an inch thick (roughly 1/3 of a cm) but you don't have to be exact.

Cut the dough into squares roughly 2.5 cm in diameter. Use a toothpick or skewer to poke a hole in the centre of each square.

If you want to you can sprinkle herbs or seasoning before baking. We did one tray with smokey paprika and they were yummy!

Bake for 13-17mins or until puffed and golden. Allow to cool on trays before removing and store in an air tight container


And here is a few shots from our day out fishing last weekend. We had the Friday off work and when we woke up it was a beautiful sunny day so we decided to make the most of it. We jumped in the car and drove to Cremorne which is only probably 45mins drive from our place and found a beautiful (and desserted) jetty to set ourselves up on.


We spent the majority of the day here, fighting with the crabs and the rays, soaking up the sun and just relaxing.


Plus we caught a salmon which was lovely grilled with some lemon oil and mint from our garden for lunch the following day!


I never thought I would be much of a fishing person, but I do enjoy spending quality time with Mr B and getting outside in the fresh air. It's very peaceful and very relaxing which is what all weekends should be!

Mrs B xx

Monday, April 1, 2013

Zucchini Chips and Home Made Mozzarella

Continuing on with our love affair with cheese making, Mr B and I spent a rainy afternoon last weekend making mozzarella.

It was actually really easy to make and the best part is it's ready to eat straight away - hello creamy mozzarella!

To make the mozzarella, we followed THIS video on YouTube. We use a Mad Millie Cheese Making Kit and not only are the instructions in the kit great, but most of the recipes are backed up by YouTube videos as well which I find really useful.

So as you can imagine, Mr B and I had a week filled with mozzarella goodness!

First of all we ate it in fresh rolls with juicy tomatoes.


Secondly we stuffed it inside some chicken breasts with basil and then coated them in panko breadcrumbs before baking  them in the oven.


And thirdly we tried it in a good old caprese salad with tomatoes and basil.

This was definitely my favourite. You can't beat the combination for flavour plus it took me right back to Sorrento where we ate this every night on our honeymoon.


And in the background of this photo, next to the stuffed capsicum....which is topped with melted mozzarella... you can see some zucchini chips that we made. To quote Mr B, these were the bomb-diggity which I have come to realise means they were pretty damn good.

To make them for yourself you will need:

2 x zucchini cut into sticks
1 cup panko breadcrumbs
1 tbspn parmesan cheese
Salt and Pepper to taste
1 egg, lightly beaten

Pre-heat oven to 150C

Combine the panko breadcrumbs with the parmesan. Season with salt and pepper.

Dip the zucchini sticks into the egg and then into the breadcrumbs. You might need to press the breadcrumbs down to ensure they stick.

Place on a lightly greased oven tray and bake for 20-25 mins or until golden brown.

These were so tasty - I could have eaten a whole bowl of them!

Enjoy!

Mrs B xx

Sunday, March 24, 2013

Chicken, Lemon and Parmesan Burgers

It's 4:54pm on Sunday evening and after a full day in the kitchen (Ok so by the time I got out of bed it was a half day, but still....) I'm conked out on the couch exhausted. There is just no way I'm getting up any time soon to prepare dinner, which is OK because we only just had lunch....but I'm actually not that convinced I'll be moving from this spot anytime in the next 24 hours so Mr B may have to fend for himself tonight. 

On night's like these, it's great to have a stash of go-to meal ideas that are easy, delicious and most of the time you have all of the ingredients in your cupboard. Plus let's be honest, it's either these, a bowl of cereal or a packet of microwave pasta....I know which one I'd prefer! 

These burgers are packed full of flavour and unbelievably juicy and moist - you will find that your dragging yourself off the couch to go back for seconds in no time! 


Chicken, Lemon and Parmesan Burgers

You will need:

2 x chicken breast, cut into chunks
1 egg
2 tspn crushed garlic
1/2 cup breadcrumbs
1 tspn wet italian herbs (I used Gourmet Garden brand) or alternatively you could use 1 tbspn finely chopped fresh basil
Rind from 1 lemon, finely grated
1/3 cup parmesan cheese
1/4 cup plain flour
1 tbspn olive oil
4 x soft rolls
Lettuce, tomato and cheese

Place all ingredients, except flour, into a food processor. Process until all ingredients are combined. The chicken should be completely minced up with no big pieces remaining in your mixture.

Place the flour in a bowl or on a plate. Shape the chicken mixture into 8 patties and lightly dust with flour.

Place the floured patties on a plate and let them firm up in the fridge for 20-30 mins.

Heat the oil in a fry pan over medium heat. Cook the patties in batches for 7-10 mins before turning over. Cook until both sides are golden and patties are cooked through.

Serve in rolls with lettuce, tomato and cheese.

Enjoy!!

Mrs B xx

Sunday, March 10, 2013

Home Made Halloumi


Mr B and I have decided to retire and become cheese makers.

Ok maybe not like full on cheese makers, maybe just Cheddar, Colby, Paneer and Halloumi cheese makers.

Ok maybe not like cheese makers that sell their cheese.....maybe just cheese makers that make and then eat lots of cheese.

Do you think someone would pay us for that?

You see a few weeks ago, we made our first batch of Halloumi Cheese and we were so impressed that today I was up early making a big double batch so we had enough to share with friends and family and of course, some for us! To start with I was abit unsure about the whole Halloumi making thing because I mean even though we have made some awesome cheeses, I couldn't for the life of me comprehend that we would be able to pull off a beautiful salty, squeaky Halloumi, but you never know if you don't try right?!

So try we did. I spent an afternoon making the Halloumi and that night Mr B dutifully BBQ'd it....we both sat down at the dinner table, excited and nervous and silent. We dug in. I was nearly too scared to chew but then I heard Mr B squeaking away and saw the grin on his face, we had somehow pulled it off! You have never seen two people so excited about some squeaky cheese I tell you. It tasted like the real deal and it had come out of our kitchen and all for the cost of a 2ltr carton of milk.....not bad hey!

You can most certainly do this yourself - just pop into your local home brew show and they should have some rennet and calcium chloride or I think you can buy them online pretty easily too. Plus don't forget you will get a nice sized portion of ricotta out of the leftover whey too!

Home Made Halloumi Cheese - Yield approx 300g

2 litres of unhomogenised full cream milk
1/2 tablet rennet dissolved in 2 tbspns cold water
1 ml calcium chloride

In a large saucepan, heat the milk over medium heat to 45C.

Add the rennet and calcium chloride and stir well. Turn the hot plate off, but leave the saucepan sitting there for around 45 mins or until a firm curd has formed.

Once the curd is formed, cut the curds vertically and horizontally into roughly 1 inch squares.

Heat the saucepan to 35C, stirring the curds gently with a slotted spoon for 10 mins.

Line a colander with butter muslin and place it over a large bowl. Scoop the curds out of the saucepan and into the lined colander. Cover the top of the cheese with muslin and place a weight such as a large bowl of water on the top. Leave to drain for 60 mins, flipping over half way through.

Meanwhile, use all that whey to make some ricotta!

Ok, back to the halloumi now.....once it has finished draining, remove the halloumi from the muslin and slice into your desired shape / size.

Bring a large saucepan of water to the boil on the stovetop. Gently place the halloumi into the saucepan and gently stir occasionally.

Once the halloumi rises to the surface it is done - remove it to a rack using a slotted spoon and sprinkle both sides with cheese salt.

Now all that's left to do is throw it on the BBQ, fry it up and enjoy!!


Mrs B xx

Wednesday, February 20, 2013

Mac and Cheese Topped with Loaded Potato Skins

On Sunday morning, Mr B was pottering around the kitchen making our egg and bacon breakfast while I was lazing around in bed. Feeling a little guilty about this, I decided to get up and give him a hand, albeit with the end stages of preparation. This was my first mistake. You see I was tired.....very tired. All week Mr B and I both look forward to our Sunday morning egg and bacon breakfast and for me it's about the whole package, sitting in bed with my eggs and bacon and a cup of coffee. But on this fateful morning, in my sleep deprived state, I topped my coffee mug up with milk instead of boiling water effectively giving me a large iced coffee to go with my eggs and bacon. I tried to fix it but only managed to make it worse. Cue no coffee for me. And for some reason, that just upset my apple cart (or coffee cup) for the whole entire day, I was hot and bothered and a giant grumble butt and in my mind that was how I was going to stay until I got my egg and bacon and coffee package next Sunday! 

Anyway, given it was a lovely sunny day and the bushfire threat around home had eased, Mr B decided it was a perfect day for a road trip to the Tahune Airwalk. Me and my grumpy pants were obviously thrilled about a 3 hour round trip in the car on a stinking hot day and we were even more thrilled to be hot and sweaty and bombarded by flies the whole time we were there, but grumpy pants aside, it was a beautiful spot with some incredible scenery. 

Whilst we were there, Mr B took the opportunity to go hang gliding which saw him cruise for 400m across a river at around 40km p/h. From what Mr B tells me, the view was amazing and just to be sure, he went twice! 


The airwalk itself is over 600m of what can only be described as 'walking in the tree-tops,' I mean take a look for yourself......


After the airwalk, we went on another walk through the forest that took us over two swinging bridges where yes, we both jumped up and down like little kids....and I may have cracked a smile. 

Anyway, to make up for my slightly grumpy mood, I decided to make Mr B a super fantastic awesome dinner guaranteed to make him totally forget that he is married to a sometimes grumpy pain in the butt wife and probably also to thank him for not leaving my grumpy ass down in the forest....


The only dish guaranteed to cover all of the above was this Macaroni and Cheese topped with Crispy Potato Skins filled with Bacon and Sour Cream.....oh yeah, you heard me.

It sounds long and complicated, but it tastes amazing and decadent and is comfort food wrapped up with I love you forever food topped with bacon....what more could you want?

Macaroni and Cheese topped with Crispy Potato Skins filled with Bacon and Sour Cream - Serves 4

250g macaroni
1.5 tbspn butter
1/2 tbspn plain flour
1.25 cups full cream milk
1/2 cup sour cream plus 1/2 cup extra
3 cups shredded tasty cheese
100g cream cheese
1 tspn cajun seasoning
2 rashers short cut bacon, finely diced
4 spring onions, finely diced
4 large potatoes

Pre-heat oven to 200C. Place the potatoes in an ovenproof dish and roast for an hour. Once they are cooked, remove from the oven to cool. Reduce oven heat to 180C.

Meanwhile, cook the macaroni as per packet directions.

While the macaroni is cooking, place the butter in a saucepan over medium heat. Once the butter has melted, add the flour and whisk until smooth (roughly 1 minute)

Add the milk, 1/2 cup sour cream and the cream cheese. Continue whisking until smooth. Add the shredded cheese and cajun seasoning and whisk until everything is combined. In a large oven proof dish, combine the macaroni and cheese sauce. Set aside.

Take the potatoes and cut in half. Depending on the size of your potatoes, cut each half into 2 pieces for small potatoes or 4 pieces for larger ones. Using a spoon or a melon baller, remove the majority of the flesh, leaving a thin layer of potato still in the skin. Scatter the potatoes over the top of your macaroni.

Lightly brush the potato skins with some olive oil.

Fill each potato skin with a tspn of the remaining sour cream.

In a fry pan over medium heat, cook the bacon and spring onion for 5-7 mins or until bacon is nice and crispy. Scatter the bacon and spring onion over the top of the potatoes.

Sprinkle with the remaining grated cheese and bake for 20-25 mins or until cheese is melted and golden.

I know it sounds a little fiddly, but alot of the processes take place simultaneously and to be honest, it's totally worth it (and Mr B totally thinks I'm an awesome wife again!)


Mrs B xx

Thursday, January 31, 2013

Asparagus and Camembert Quiche

Where are the days going? So far 2013 feels like one of those cartoons where the pages just fly off the calendar, one second it’s January and a split second later it’s February!! That’s ok though, I plan to make every minute count this weekend with lots of baking, relaxing afternoons full of buttery shortbread dunked in cups of tea, some quality Mr and Mrs B time exploring the outdoors, and general lounging about. We also have a giant trailer load of wood chips to spread around the front garden too but at this stage I'm choosing not to think about that.

Do you know what is a great meal if you have general lounging about planned, or if you need a quick pick me up after excess wood chip shovelling? Quiche. Super easy to throw together, can be eaten hot, cold or in a sandwich (trust me....) and assuming you can drag yourself off the couch or away from your book for say 10 mins to throw it all together, you’re good to go!

Mr B and I had some of our home made camembert leftover last week so we were looking for a recipe to use it up in, I was thinking asparagus, I was thinking quiche and we were extremely impressed with the results, this quiche has a tonne of flavour from frying off the bacon and the onion first and when you get it out of the oven the camembert will be all gooey and melty and awesome. I would even go as far as to say this quiche was even better the second night (but aren't they all!)


Asparagus and Camembert Quiche - Serves 4

You will need:

1 tbspn olive oil
1 bunch of Asparagus, trimmed
1 onion, finely diced
5 eggs
1 tspn Dijion mustard
½ cup milk
150g (3-4 slices)shortcut bacon, diced
60g Camembert, thinly sliced

Pre-heat oven to 180C.

Heat oil in a frying pan. Add the onion and bacon. Cook for 5-7 mins or until onion has softened and bacon is cooked. Remove from pan and set aside.

Add the asparagus to the pan and cook for 2-3 mins or until softened.

Whisk the eggs, mustard and milk together. Season with salt and pepper. Pour the egg mixture into a quiche dish.

Arrange the camembert and asparagus on top of the mixture.

Bake for 30-40 mins or until set and golden. Serve with steamed vegies and / or salad.

Enjoy!

Mrs B xx

Thursday, January 24, 2013

Home Made Paneer Cheese

Since Mr B brought me some DIY cheese kits late last year, we have been right into this whole cheese making thing. It's just so easy and the end result is so much nicer then anything you buy in the shops. A few weeks ago, we made some Paneer cheese and last night, we decided to try it in a lamb curry. It was beyond awesome and totally took over as the star of the meal. Normally paneer is quite a bland cheese and simply soaks up the flavours of whatever you cook it in, but this home made cheese is made using lemon juice so the end result is soft, creamy and has just the slightest hint of lemon! Best part is, you don't need any fancy gadgets or equipment, just a big pot and some butter muslin (which you should be able to buy at any craft shop). Home made cheese is totally not scary, it's delicious and the end result is very satisfying!! 


Home Made Paneer Cheese

3.8 Litres of whole unhomogenised cow's milk
8-10 tbspns of lemon juice

In a large pot, heat the milk to a gentle boil, stirring often.
Reduce the heat to low and drizzle in 8 tbspns of lemon juice. Cook for 10-15 seconds.

Remove from the heat and stir gently. Allow the mixture to sit for 5-10 mins. If the mixture has not formed large curds in this time, return to the heat and add the remaining 2 tbspns of lemon juice. Basically just keep adding lemon juice gradually until you notice the curds visibly separating and leaving the whey behind. If the whey still looks milky, keep adding the lemon juice.

Remove from the heat and allow to sit for 10-20 mins.

When the curds have settled below the whey, ladle them into a colander lined with butter muslin.

Tie the corners of the muslin in a know and hold the bag under some gently running warm water for 5-10 seconds. Gently twist the top of the muslin to squeeze out any extra whey.

Hang the bag to drain over a bowl for 2-3 hours. Once the bag has stopped dripping, unwrap the cheese. Eat right away or refrigerate for up to two weeks.

Edit - if you like a firmer paneer, instead of hanging the cheese to drain, place it in the colander, still wrapped in the muslin, with a heavy object (such as a bowl full of water) on top for 3-4hrs.

Now before you go anywhere....don't tip the whey down the sink or do anything stupid like that. While it's fresh, use it to make the best ricotta you have ever tasted!

To make the ricotta, simply measure out how much whey you have and adjust this recipe accordingly.

For every 5 litres of whey you have you will also need:
2 cups of full fat, homogenised milk
40ml of white vinegar
Any herbs you may wish to add

Heat your whey to 60C, stirring frequently.

Add the milk and continue to heat until the mixture reaches 90C. Continue to stir.

Once the mixture hits 90C, add the vinegar.

Leave the mixture to stand over low heat for 5-10 mins. Gently scoop off the layer of curd that has risen to the surface into a colander lined with butter muslin. If you wish to add any herbs or flavourings, now is the time to do it. Tie the ends of the muslin up and hang over the bowl for 2-3 hours. Once the mixture has stopped dripping it is ready to eat or to store in the fridge for a week.

Just like with the paneer, this is such a beautiful soft, creamy cheese....it totally won't last the week!

Enjoy!

Mrs B xx

Wednesday, January 23, 2013

Savoury Cheesy Pumpkin Patties

I am lucky enough to have today off work, which means I am sitting in bed, cup of coffee in hand, plate of toast at my side, writing this to you. Normally my day off falls on a Friday, as does Mr B's, and we spend the day together, but last Friday I had to go into work and Mr B got to spend the day doing his own thing which is lovely for him, but crappy for me. In my opinion, there is nothing worse then dragging yourself out of bed at stupid o'clock to go to work whilst your partner remains all snuggly and warm and sleepy under the covers. In saying that though, today it was quite nice to be the one who got to stay in bed whilst Mr B got up in the early morning hours and went to work for a change! 


These Savoury Cheesy Pumpkin Patties are so simple to make and so tasty! And the best thing is they are fantastic in hot or cold which makes them great for dinner or for lunchboxes!

Savoury Cheesy Pumpkin Patties - Makes roughly 10-12

2 cups cooked mashed pumpkin
150g vintage cheddar, cut into small cubes
1 medium onion finely diced
1 tpsn crushed garlic
1 stick of celery finely diced
1 cup rolled oats
Salt and Pepper to season

In a fry pan over medium heat, combine the onion, garlic and celery and cook for 5-7 mins or until onion has softened.

Add all the ingredients to the bowl of a food processor and process until everything is well combined.

Lightly grease a fry pan over medium heat. Place heaped spoonfuls of the mixture into the pan and flatten out using the back of your spoon. Cook for 2-3 mins on each side or until golden brown.

Now Mr B and I had these fresh out of the fry pan in some salad rolls for dinner, however, I had one cold the next day and I definitely recommend it, don't get me wrong, they are super tasty and delicious when they are hot, but when they are cold you just get so much more flavour from the cheese and the pumpkin and the celery and it's just awesome....plus Mr B had no idea the oats were in there at all so that's a bonus if you have fussy eaters to deal with!!

Enjoy!

Mrs B xx

Sunday, November 25, 2012

Lemon Parmesan Chicken Schnitzel

So it's Sunday night, the weekend has disappeared in a whirlwind as usual and you have to work tomorrow. In reality the last thing you probably want to do on a Sunday night is cook dinner - given the option most weekends I would choose a bowl of cereal or a piece of toast. 

This weekend is no different. Mr B and I had Friday off, but somehow a 3 day weekend does nothing to reduce the amount of things you need to do or how tired you feel come Sunday evening. Today Mr B was offered some overtime so he went to work at 7am....which meant for some stupid reason I was up at 7am too! I mucked around in the kitchen for awhile and finished off the Cream Cheese I started making on Friday, before using the leftover whey to make some Ricotta. Then I straightened my hair, had a bowl of cereal, a cup of coffee and it was only 8am! This was all wrong.....I don't even normally open my eyes till at least 9am on a Sunday!! At about 11am the shearer arrived to shear our little lambies. The poor little things were all wool and look completely different (and a little lanky) now that they are 'nakey,' but hopefully it will keep them cooler through the summer. I'll get some photos of them to show you as soon as they are speaking to me again!  I spent the rest of the day out and about trying to get myself organised for Mr B's birthday this week and for Christmas. I walked back in the door at the same time as Mr B and we both collapsed on the bed, hot, bothered, and exhausted!! Did someone say Fruit Loops for dinner???


This Lemon Parmesan Chicken Schnitzel is really easy to make. The combination of the lemon and parmesan gives it a real flavour kick and the panko breadcrumbs just makes it so crunchy!!  We just served ours with some steamed broccoli and home made potato chips and it was just like going to the local pub for a counter meal, but without the bill at the end of it!! This is definitely something I would keep as my go-to lazy night meal and I'm thinking I will try it with some veal steaks next weekend!

Lemon Parmesan Chicken Schnitzels

Serves 2

1 large chicken breast
1/2 cup dried panko breadcrumbs
1.5 tspns finely grated lemon rind
1 egg
2 tbspns plain flour

Butterfly your chicken breast (cut in half so you have two thin chicken breasts) and set aside.

Combine breadcrumbs, parmesan and lemon rind. Season with salt and pepper and place on a plate.

Whisk egg in a small bowl.

Place flour on a plate.

Coat 1 piece of chicken in flour, shaking off the excess. Dip into the egg and then coat in the breadcrumb mixture. Refrigerate for 20-30 mins.

(Meanwhile, chuck some greens, like beans or broccoli on the boil )

In a well oiled fry pan over medium heat, cook the schnitzels for 5 mins on each side or until golden and cooked through.

Mrs B xx

Wednesday, November 14, 2012

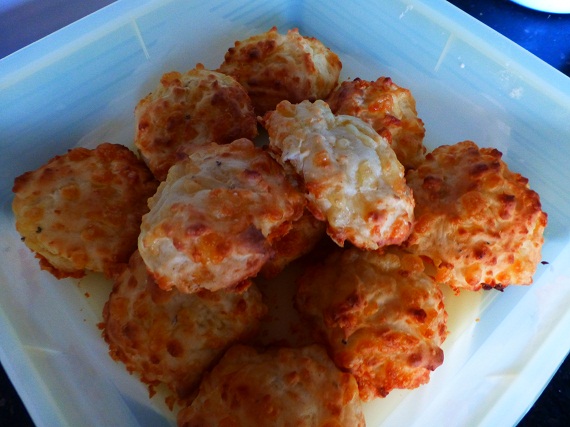
Cheese Puffs - Take Two!!

Awhile ago I made these Cheese Puffs and Mr B and I thought they were fantastic. Then last weekend I made them again but with a few small tweaks. As it turns out, the first lot I made were more like Cheese Scones...but the second lot....they were what a Cheese Puff is all about!! The second lot were much more airy and cheesy and flavoursome then the first lot and Mr B proceeded to demolish them until I stepped in  and firmly remind him they were for his lunches! 


Cheese Puffs - Take Two! 

1.5 cups grated tasty cheese
1 cup plain flour
2 tspn baking powder
1 egg, lightly beaten
95 ml milk
1/2 stock cube (I used Massel Vegetable Stock Cubes)

Pre-heat oven to 240C and grease 2 baking trays.

Combine all ingredients in a large bowl and stir well.

Place tablespoons of the mixture onto the trays with roughly a 3-4cm gap inbetween.

Reduce oven heat to 160C and bake for 10-15 mins or until golden.

Serve warm with butter or they will keep in the fridge for up to two weeks.


This recipe made about 12 so if you have hungry little munchkins in your house, like Mr B, then I suggest you double it.....or prepare to make it frequently!!

Mrs B xx


Friday, November 9, 2012

Tornadoes, Cheese and Cake?!


Today we have experienced tornado warnings of all things....I mean I know in some parts of the world tornadoes are common place, but I live in Tasmania....tornadoes just don't happen here! Apparently they were only little ones, but I have always appreciated and liked living in an area where we are 'tornado free' and it does make me feel uneasy thinking that we are starting to see them, even if they are minor. 

Mr B and I seemed to escape the worst of the weather today - I got caught in a small hail storm and Mr B played in a thunderstorm but thankfully that was all. To be honest my first thought when I saw all the weather warnings around the place was 'I just don't have time for this today, I have baking to do!' Tomorrow I am entering two of my cakes and some jewellery in the Brighton Show. I have never entered my cooking in a show before and I'm not expecting to win anything, it's just something I have always wanted to do. So today I was busy making an orange cake and a chocolate cake with the hope that they will do me proud tomorrow! 
                                   

For my birthday a few months ago, Mr B brought me two fantastic cheese making kits. The first thing we attempted to make was a Farmhouse Cheddar. There are a few steps involved in making the cheese, but it's not hard, it's just time consuming and requires more patience then anything - we made this cheddar in mid-September and it's just ready to try now! The cheddar was actually ready to try last weekend, but Mr B and I have been dancing around it for the last week because whilst we were both excited, we were also terrified that when we cut it open it would be blue or that it would taste disgusting. Anyway, with all the talk of tornadoes and the fact that we were locked inside going crazy today, we decided to bite the bullet and try our cheese. I cut a small wedge out of the 1kg round of Cheddar (with my eyes closed....) and Mr B and I both had a small tentative nibble....our eyes widened and there was blissful silence as we scrambled around gathering biscuits and scoffing cheese - it was delicious! And it actually tasted like cheddar!! 

Let me show you some pictures of our cheese making journey! 


The cheese all made and ready to air on the bench for a few weeks.


Mr B coating the cheese in wax. 


6 weeks later.....the finished product! 


1kg of delicious, creamy, home made cheddar cheese! 

I still can't believe we made it ourselves!! At the moment we have some camembert ageing as well so fingers crossed that comes out just as good! 

Mrs B xx 

Wednesday, September 26, 2012

Chicken, Leek and Cheddar Tart

You know how sometimes for like your birthday or Christmas you get some really dodgy presents that show next to no thought? Like I know if someone brought me say a book on modern physics I would be highly un-enthused....but if they get me anything shoe, tattoo, kitchen, cooking, baking, pin-up, vampire related I am one happy little vegemite. Plus I am very lucky to be surrounded by people who put alot of thought and effort into their present buying so I haven't had to poke anyone's eye out with a candle just yet......

Which brings me to what we had for dinner last night, you see for my birthday a few weeks ago, one of my beautiful friends brought me a cookbook called Delicious Baking. This cookbook is very dangerous....every single recipe in there looks and sounds amazing to the point where you may possibly drown in your own drool or you will bake so much that you will be buried alive under a pile of backed goods - personally I think the second option is a pretty good way to go! So last night when Mum and Dad came for dinner, I knew exactly what to make. This Chicken, Leek and Cheddar tart has seen a few alterations from the original recipe in the book, but it really was easy and delicious plus the layer of mustard gives it a real flavour kick!


You will need

8 sheets filo pastry
30g butter + 1 tbspn melted butter extra
2 large leeks (sliced)
3 thyme sprigs (or 1 tbspn Gourmet Garden thyme)
2-3 tbspns wholegrain mustard
1 cup shredded bbq chicken
3 eggs
300ml thickened cream
120g vintage cheddar cheese (shredded)

Pre-heat oven to 180C

Line a tart pan or quiche dish with filo. To get good coverage of the sides you might place 4 sheets horizontally and 4 sheets vertically or just layer them individually and overlap them around the dish.

Brush with melted butter.

Heat the remaining butter in a fry pan over medium heat. Add the leeks and thyme and cook for 5-10 minutes or until leeks are tender.

Spread the mustard over the base of the tart. Top with leeks and chicken.

In a bowl or large jug, whisk together the eggs and cream. Stir through the cheese and season well with salt and pepper. Pour over the chicken and leek.

Bake for 25-30 mins or until golden and set. Serve warm with salad and / or steamed vegies.

Enjoy!

Oh and before I go - Hi Michelle!!

Mrs B xx

Sunday, September 16, 2012

Pie, Pie and more pie!

Well what a day today has been! The day started off cold, wet and windy and Mr B and I feared our day off would go to waste, but then Mum and Dad showed up to lend a hand and they brought enough motivation with them to bring the sun back out for a little while. Mum and I got our green thumbs on in the garden, potting plants and tidying up some of our garden beds whilst Dad and Mr B got stuck into building our new pergola. It's amazing how much difference all the work makes to the look of the house! Just as we had all finished lunch, our ears pricked up to the sound of a car in the driveway and it was none other than Ali and baby Noah calling in for a long awaited catch up. A great day turned into an awesome day (who would have thought I would be saying any day that involved gardening was an awesome day.....)

Whilst we are on the confessional trail, I have another one to make.....we have had pie for dinner EVERY night this week.... but in all fairness Mr B brought me a family sized pie maker for my birthday last week and we all know I get a little excited about new kitchen appliances.....


One of the pies we made this week was this Haloumi and Fish Pie. The combination of the fish and the rice with the currants topped with melty haloumi is fantastic on it's own, but then add in the golden, crispy, flaky pastry and you are on a winner! 


Haloumi and Fish Pie 

You will need:

1 brown onion, finely chopped
  • 1 tspn crushed garlic 
  • 1 tspn crushed wet basil
  • 1/2 cup long-grain white rice 
  • 1/4 cup currants
  • 1/3 cup dry white wine
  • 400g tin of diced tomatoes 
  • 250g firm white fish fillets
  • 1 x 250g pkt haloumi, coarsely grated or thinly sliced
  • 1 sheet of reduced fat puff pastry
  • 1 sheet of reduced fat shortcrust pastry

  • Preheat oven to 180°C. 

  • In a lightly greased frypan, add the onion and garlic and cook for 3-4 minutes or until onion softens. 

  • Place the rice in a microwave safe dish, cover with hot water and cook in 5 minute bursts on high, stirring regularly, until cooked. 

Place fish fillets in an oven proof dish and cook for 15 mins if fresh, 25 mins if frozen. 

Add the diced tomato, basil and wine to the onion and garlic. Bring to the boil and then allow to simmer for 12 minutes. Stir in the cooked rice and currants. 

Once the fish is cooked, break it up with a fork and then stir through the sauce mixture in the fry pan. Now if you want, you can serve it up right here and now with some thinly sliced haloumi on top and some crusty bread. Believe me, this is how I had the leftovers and it was delicious. 

Or you can carry on and turn it into a pie! 

If you have a pie maker, pre-heat it and cut the pastry into the appropriate size discs. Use the shortcrust pastry for the base and if you have a family sized pie maker, use about 2 cups of the mixture for your filling. 

Cover with thinly sliced or grated haloumi and then top with your puff pastry lid. Now in a family sized pie maker, this will take around 15-20 mins to cook. In a smaller pie maker it would take around 10-12 minutes. I found that this recipe made enough to fill the family size pie and there was still a bowl leftover for lunch the next day.  

  • If you don't have a pie maker, never fear, you could follow the same steps with a pie dish, brush with some melted butter or egg-wash and place it in the oven to cook for around 20-25 mins or until the pastry is golden. 

We served ours with some cabbage casserole. My Mum used to make this all the time when I was younger and it was the one thing I just baulked at every single time but now, I love it! Go figure hey! 


Mrs B xx

Friday, September 14, 2012

Mum's Cheesy Vegie Filo Pie

Hello RDO - how I have missed you! You know since I changed my hours at work to having every second Friday off, the week where I actually work 5 days seems to go FOREVER!! But then you wake up on Friday's like today where it's cold and wet and all I have to do is get out of bed, let the lambies out for a run around and make Mr B and I brekkie before I crawl back into a nice warm bed. And this RDO is extra exciting because last night Mr B and I started playing with the Cheese Making Kits he brought me for my birthday. At the moment I am staring at some farmhouse cheddar which is nearly ready to move from the press and there is a beautiful big ball of fresh ricotta in the fridge that we made with the left over whey last night! We had a sneaky sample of the ricotta last night and it is honestly like silk, smooth, creamy, silky ricotta...I'm in love. Sorry Mr B - although I caught him making eyes at the cheddar several times last night....

So with all this cheese we are going to be making, we need some tasty cheesy recipes and my Mum is THE go-to person for cheesy recipes....like this one for her Cheesy Vegie Filo Pie! This pie is packed with vegies and it's got loads of flavour - if you're into garlic and cheese, you're going to want to get all over this pie! 


You will need:

6 sheets filo pastry
1/4 cup melted butter
1 x head of broccoli diced
2 x carrot sliced into thin sticks
1 x onion diced
1 x capsicum diced
2 x small zucchini sliced into thin sticks
4 cloves of garlic crushed
1 cup of grated mozarella or colby cheese
1 cup of grated cheddar cheese

Grease a rectangle oven proof dish and pre-heat oven to 180C

Combine cheese and garlic in a large bowl.

Line dish with 3 sheets of the filo pastry, brushing each layer with butter and sprinkling with some of the cheese mixture.

Arrange vegetables on top of filo pastry. Sprinkle with some more of the cheese mixture. Season with pepper.

Top with remaining filo sheets, brushing each layer with butter and sprinkling with the last of your cheese mixture. Finish with a layer of filo. Make sure the edges are sealed all the way round - this ensures your vegies steam nicely.

Bake for 50-60 mins or until pastry is golden.

Enjoy!!

Mrs B xx

LinkWithin

Related Posts Plugin for WordPress, Blogger...