Thursday, November 29, 2012

Tuna and Quinoa Fattoush

Last Tuesday when Mum and Dad came for tea, I wanted to do some sort of nice hearty salad for dinner. The weather here has been warming up a fair bit lately, plus I knew we had a whopper of a cake for dessert as part of the week long birthday festivities for Mr B, so a light dinner was definitely in order.

I have to be careful serving salad up for dinner with Mr B because if I directly use the word salad in relation to what we are having for dinner, he will have talked himself into believing I'm dishing up a bowl of lettuce and it won't matter what I actually serve up, he will still leave the table hungry....plus he will sing 'You don't win friends with salad' from the Simpsons all night....

I have been eyeing this particular recipe off for awhile and, with the addition of the tuna, I think it makes a lovely hearty meal that is quite satisfying and doesn't leave you feeling like you've just eaten a bowl of lettuce.


Tuna and Quinoa Fattoush

You will need:

2 rounds of pita bread
 ¾ cup quinoa
1 cup water
1 red onion, thinly sliced
2 tbspns balsamic vinegar
1/4 cup lemon juice
2 tbspns olive oil
1 tspn sumac
3 tomatoes, cut into wedges
2 lebanese cucumber, thickly sliced
100g feta cheese crumbled (we used 100g of our homemade Farmhouse Cheddar so you could use a sharp crumbly soft cheddar as well)
2 x 185g tuna chunks in springwater, drained
Optional - 4 hard boiled eggs

Preheat oven to hot, 200°C.

In a small bowl, combine onion and vinegar. Set aside 15 minutes.

Tear pita bread into small pieces and place on a baking tray. Bake for 8-10 minutes or until golden and crisp.

Meanwhile, in a small saucepan, combine quinoa with water. Bring to the boil on high. Reduce heat to low. Simmer 10-12 minutes, until tender. Cool 10 minutes.

Combine lemon juice, oil and sumac in a screw-top jar. Season to taste. Shake well. The jar is definitely the go because I tried doing it in a bowl and just ended up with sumac stuck all around the sides and the bottom and a nice pool of lemon and oil in the middle!

In a large bowl, combine quinoa, feta, onion, tomato, cucumber, tuna, pita and half of the dressing. Toss well and drizzle with remaining dressing. Top with sliced hard boiled eggs if you want some added protein!

Next time I think I would add some sliced up avocado as well - but that could just be because I'm going through an avocado phase at the moment and adding it to EVERYTHING!!!

Enjoy!!

Mrs B xx


Sunday, November 25, 2012

Lemon Parmesan Chicken Schnitzel

So it's Sunday night, the weekend has disappeared in a whirlwind as usual and you have to work tomorrow. In reality the last thing you probably want to do on a Sunday night is cook dinner - given the option most weekends I would choose a bowl of cereal or a piece of toast. 

This weekend is no different. Mr B and I had Friday off, but somehow a 3 day weekend does nothing to reduce the amount of things you need to do or how tired you feel come Sunday evening. Today Mr B was offered some overtime so he went to work at 7am....which meant for some stupid reason I was up at 7am too! I mucked around in the kitchen for awhile and finished off the Cream Cheese I started making on Friday, before using the leftover whey to make some Ricotta. Then I straightened my hair, had a bowl of cereal, a cup of coffee and it was only 8am! This was all wrong.....I don't even normally open my eyes till at least 9am on a Sunday!! At about 11am the shearer arrived to shear our little lambies. The poor little things were all wool and look completely different (and a little lanky) now that they are 'nakey,' but hopefully it will keep them cooler through the summer. I'll get some photos of them to show you as soon as they are speaking to me again!  I spent the rest of the day out and about trying to get myself organised for Mr B's birthday this week and for Christmas. I walked back in the door at the same time as Mr B and we both collapsed on the bed, hot, bothered, and exhausted!! Did someone say Fruit Loops for dinner???


This Lemon Parmesan Chicken Schnitzel is really easy to make. The combination of the lemon and parmesan gives it a real flavour kick and the panko breadcrumbs just makes it so crunchy!!  We just served ours with some steamed broccoli and home made potato chips and it was just like going to the local pub for a counter meal, but without the bill at the end of it!! This is definitely something I would keep as my go-to lazy night meal and I'm thinking I will try it with some veal steaks next weekend!

Lemon Parmesan Chicken Schnitzels

Serves 2

1 large chicken breast
1/2 cup dried panko breadcrumbs
1.5 tspns finely grated lemon rind
1 egg
2 tbspns plain flour

Butterfly your chicken breast (cut in half so you have two thin chicken breasts) and set aside.

Combine breadcrumbs, parmesan and lemon rind. Season with salt and pepper and place on a plate.

Whisk egg in a small bowl.

Place flour on a plate.

Coat 1 piece of chicken in flour, shaking off the excess. Dip into the egg and then coat in the breadcrumb mixture. Refrigerate for 20-30 mins.

(Meanwhile, chuck some greens, like beans or broccoli on the boil )

In a well oiled fry pan over medium heat, cook the schnitzels for 5 mins on each side or until golden and cooked through.

Mrs B xx

Thursday, November 22, 2012

Cheat's Chocolate Fondant


I'm going to be honest with you here. This chocolate fondant very nearly broke me. The first night I made it, it stuck to the ramekin and fell apart....it was delicious, but it was a mess. The second night, it held together, but an awful lot of the inside seemed to ooze out and I felt it was slightly under-cooked. The third night, it held together, but upon digging into it, there was no oozing what so ever....it was over-cooked. Honest to goodness, this damn thing was so delicious, but driving me crazy at the same time!!

Mr B was completely oblivious to this. Each night I sat on the couch with my head in my hands trying to figure out how I had managed to bugger it up yet AGAIN, but each time Mr B sat there happily devouring the bowl placed in front of him. On the 3rd night when I was just about in fondant induced tears, Mr B piped up and told me that version no. 2 was his favourite and he thought I had nailed that one. Looking up between my hands from where I was curled up in the foetal position, I said "Really?" and Mr B went on to explain the ins and outs of fondants and why version no. 2 got his vote and why in his opinion, version no. 2 was what a fondant was supposed to be like. I mean it WAS a light chocolate mousse like pudding with a gooey oozey chocolate centre and it WAS down right delicious and fancy looking. So I decided to put some faith in Mr B's vast knowledge and experience with chocolate puddings and considered the recipe successful.

Here is how it's done....

To make 1 pudding you will need:

50g milk chocolate
50g butter
1 egg
1 egg yolk
2 tbspn caster sugar
1/2 tbspn plain flour
1 tbspn cocoa
1 milk chocolate Lindt ball.

Pre-heat oven to 180C and brush a 1 cup capacity ramekin with melted butter. Line the base of the ramekin with baking paper.

Place the chocolate and butter in a microwave safe jug and heat on high for 40 seconds. Give the mixture a good stir until it is melted and smooth.

Use an electric mixer to beat the egg, egg yolk and sugar until thick, pale and creamy. Add the melted chocolate, flour and cocoa and beat until just smooth.

Spoon 2/3 of the mixture into your prepared ramekin. Place the Lindt ball in the centre of the mixture. Top with remaining mixture, ensuring Lindt ball is covered.

Bake for 15-20 mins or until just set. Allow the puddings to cool for 5-10 mins before inverting onto serving plates.

Serve with cream and enjoy!

Mrs B xx

Tuesday, November 20, 2012

Roast Pumpkin and Garlic Pies

I made these pies last week using a recipe I had adapted from a Women's Weekly Pie book Mr B brought me for my birthday this year. I had been umming and ahhing over the recipe for a little while because I was worried they might be a little bland, but they were downright tasty and delicious. They are also really easy to prepare and make a lovely light meal for a warm night. We served ours with a simple salad but we crumbled some of our home made cheddar through it and wow. Just wow.

This weekend just gone I spent Saturday afternoon getting the Camembert wrapped and in the fridge to age and making a huge round of Colby cheese which will be ready to wax tonight. I am really enjoying this whole cheese making thing, seeing (and tasting) the end result is very rewarding (and delicious) so I am thinking this weekend I might try making some Cream Cheese too!


Roast Pumpkin and Garlic Pies

1 sheet of reduced-fat shortcrust pastry
600g butternut pumpkin cut into 1cm cubes
2-3 tspns crushed garlic
1 tbspn olive oil
3 eggs, lightly beaten
1/2 cup thickened cream
100g reduced-fat fetta cheese, crumbled
2 tspns Gourmet Garden Roast Seasoning (a mix of thyme, rosemary, parsley and garlic)


Pre-heat oven to 200C.

Place pumpkin and garlic on a baking tray and drizzle with the oil. Toss everything together to ensure it is evenly coated. Bake for 20-30 mins or until pumpkin is tender.

Once the pumpkin is cooked, transfer to a large bowl and allow to cool for 5 mins.

Mash the pumpkin and garlic together - it doesn't have to be smooth, you still want it to be a bit rustic looking. Stir in the eggs, cream and herbs. Season with salt and pepper.

Reduce oven heat to 180C. Cut pastry sheet into quarters and place each quarter into the base of a small ramekin. Place the ramekins on an oven tray and cover with baking paper before filling with dried beans or rice. Bake for 10 mins. Remove the paper and beans and bake for a further 5 mins or until they start to develop a light golden colour.

Fill the pastry cases with the pumpkin mixture and sprinkle with the crumbled fetta.

Bake for 30-35 mins or until set. Serve with salad or steamed vegies and enjoy!!

Mrs B xx

Saturday, November 17, 2012

Baked Eggs with Chorizo


I don't know if this dish falls into the category of having breakfast for dinner....or having dinner for breakfast....but either way I have been keen to try making it for ages and Mr B and I were so impressed! We love our eggs runny and these eggs were just perfect for dipping your buttery toast into and then using the rest of your toast to wipe the bowl clean!

Baked Eggs with Chorizo 
Serves 2

2 eggs
2 heaped tablespoons of tomato paste
400g tin of diced tomatoes
50g of sliced chorizo
1 small onion diced
1-2 tspns of crushed garlic (depending on how much you love your garlic!)
1 tspn of wet herbs such as oregano
1-2 tspns of smoked paprika
Salt and Pepper to season
2 Turkish Pide Rolls and Butter to serve

Pre-heat oven to 180C

In a lightly greased fry pan over medium heat, cook the onion and chorizo for 5-7 mins or until onion is softened.

Add the diced tomatoes, tomato paste, garlic, herbs and paprika. Season with salt and pepper and simmer for 10 mins.

Spoon the mixture into two ramekins. Using the bake of a spoon make a hollow in the centre of each one and crack an egg into it.

Place the ramekins onto a baking tray and cook for 12-15 mins (if you like your eggs runny) and 20 mins if you like them solid!

When your eggs are nearly ready to come out of the oven, slice each roll in half and toast. Butter and cut into little portions perfect for dunking!

There was absolute silence around the table while we ate this...aside from the 'oh my god this is delicious' and 'yuuuuuuuuuummmmm' and the excited giggles of two people dunking their buttery bread into gooey eggs - plus there is just so much you can do with this dish, if you want it vegetarian just replace the chorizo with a small tin of chickpeas or kidney beans, you could add some celery, you could mix up the spices and the herbs - the possibilities are endless!

Have a fantastic weekend!!

Mrs B xx

Wednesday, November 14, 2012

Cheese Puffs - Take Two!!

Awhile ago I made these Cheese Puffs and Mr B and I thought they were fantastic. Then last weekend I made them again but with a few small tweaks. As it turns out, the first lot I made were more like Cheese Scones...but the second lot....they were what a Cheese Puff is all about!! The second lot were much more airy and cheesy and flavoursome then the first lot and Mr B proceeded to demolish them until I stepped in  and firmly remind him they were for his lunches! 


Cheese Puffs - Take Two! 

1.5 cups grated tasty cheese
1 cup plain flour
2 tspn baking powder
1 egg, lightly beaten
95 ml milk
1/2 stock cube (I used Massel Vegetable Stock Cubes)

Pre-heat oven to 240C and grease 2 baking trays.

Combine all ingredients in a large bowl and stir well.

Place tablespoons of the mixture onto the trays with roughly a 3-4cm gap inbetween.

Reduce oven heat to 160C and bake for 10-15 mins or until golden.

Serve warm with butter or they will keep in the fridge for up to two weeks.


This recipe made about 12 so if you have hungry little munchkins in your house, like Mr B, then I suggest you double it.....or prepare to make it frequently!!

Mrs B xx


Monday, November 12, 2012

2012 Brighton Show

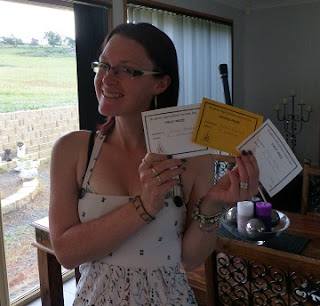
On Saturday I had the opportunity to help out at the 2012 Brighton Show in the Hall of Industries. Given that I am a little old CWA lady at heart, and I was entering some cakes and some jewellery in the Hall of Industries Home Produce and Craft section for judging, I was actually really looking forward to helping out and seeing how it all worked behind the scenes.

I arrived early in the morning and spent the first few hours collecting people's entries as they dropped them off and labelling them with their category and the entrants ID number. I just loved watching all the different entries come in and meeting the different people who made them. Some people entered nearly every category and came in with boxes full of cakes and jams and crafts....I thought I was pretty cool just entering 3 categories!

Anyway, just after lunch I was getting ready to go home when the lady judging the Produce category showed up. Not only was I anxious to see what she thought of my entries (which were de-identified with the use of an ID number) but I was really interested in seeing how the whole judging process worked, plus after talking to the judge I found out that she had completed a CWA Home Produce Judging Course and then I was totally hooked. To be very honest I thought that they literally sat down and sampled a piece of every cake and judged it on a combination of flavour and presentation, so imagine my surprise when the lady judging only tasted maybe 2 or 3 of the 30 odd cakes there! The only time cakes were actually tasted was when it was too close to call just by looking at them and even then it was only the tiniest slither little piece cut from the centre.

The judge knew that it was my first time entering a show and also my first time acting as a steward so I was really pleased that she took the time to explain all of the elements to me and show me what to look for. All of the cakes were cut in half and judged on a whole variety of factors I hadn't even really considered. Cakes that were cracked or had line marks from the drying rack were instantly discounted, cakes that were dry, undercooked or overcooked or that had frosting too thick, too thin or unevenly distributed, not a chance and if you entered a slice that had a crumbly base....well....you get the picture. Even elements such as wrapping your entry in foil rather then submitting it on a plate or submitting a jar of jam that every single steward in the room put together couldn't open would count against you.

I also had this vision in my head that if you were the only person to enter a category you were pretty much guaranteed first place. Totally not true. There were categories with one entry in them and that entry received either 3rd place or no place at all and categories with 5 different entries and only one or two places awarded, it really did come down to wether the entry deserved a prize or not. I know it sounds like a big and scary competition with absolutely no chance of winning, but it wasn't and to be honest I am actually glad that they judge it that way - I mean it makes sense doesn't it, judging on a whole variety of factors, not just taste and first impressions and only awarding prizes when they are truly deserved.

And the most exciting part is that I won FIRST PLACE in the chocolate cake category, SECOND PLACE in the orange cake category and FIRST PLACE in the beaded earring category!


I had such a fun day and I learnt so much. It was great to win something in every category I entered and even more rewarding after I had learned the requirements by which they are judged! I can't wait for next year now!!

Mrs B xx

Sunday, November 11, 2012

This Week's Highlights....

You may remember a few weeks ago I made a Rainbow Cake for my birthday? Well this week, Mr B requested rainbow cupcakes for his lunches. I made up 1 basic vanilla cake batter and divided it into 5 bowls, tinting each bowl a different colour. Then I dropped alternating teaspoons of the mixture into a greased muffin tray. I love that they came out all psychadelic looking! 


Awesome rainbow cupcakes require awesome rainbow frosting! 


To make the frosting I just made some blue, green, red and purple frosting and layered it up in a piping bag - I love that each one is different and has a different mix of colours. 


Last Sunday night Mr B and I got ourselves all dressed up and went to see a Johhny Cash Tribute Concert to celebrate what would have been the year of his 80th birthday. I will admit I was abit unsure about the concert as I'm not really a country music fan, but it was so much fun! The atmosphere was just fantastic and you really can't beat live music, Mr B and I have been singing along to some of his old Johhny Cash CD's ever since!  


Last Tuesday night Mr B and I went to visit Mum and Dad for dinner and they put up another one of their legendary caravan kitchen meals! This one is kind of like vegetarian eggs florentine.....Veggie Burgers topped with Cheese, Scrambled Eggs, Spinach and Mushrooms with a side of Haloumi and homemade Tzatziki! YUM!!


And this....well this is a bowl of ice cream, but I want to talk about the little heart sitting on top of it. I have been wanting to try this for ages and it was so easy and so awesome! Simply whip some cream up until it's thick, pipe it into a heart shape or spoon it into a heart shaped cookie cutter onto a plate covered with baking paper. Place in the freezer for a few hours and ta-da! The consistency is kind of like ice cream and I think they would be fantastic floating around in a hot chocolate or irish coffee!

Mrs B xx

Friday, November 9, 2012

Tornadoes, Cheese and Cake?!


Today we have experienced tornado warnings of all things....I mean I know in some parts of the world tornadoes are common place, but I live in Tasmania....tornadoes just don't happen here! Apparently they were only little ones, but I have always appreciated and liked living in an area where we are 'tornado free' and it does make me feel uneasy thinking that we are starting to see them, even if they are minor. 

Mr B and I seemed to escape the worst of the weather today - I got caught in a small hail storm and Mr B played in a thunderstorm but thankfully that was all. To be honest my first thought when I saw all the weather warnings around the place was 'I just don't have time for this today, I have baking to do!' Tomorrow I am entering two of my cakes and some jewellery in the Brighton Show. I have never entered my cooking in a show before and I'm not expecting to win anything, it's just something I have always wanted to do. So today I was busy making an orange cake and a chocolate cake with the hope that they will do me proud tomorrow! 
                                   

For my birthday a few months ago, Mr B brought me two fantastic cheese making kits. The first thing we attempted to make was a Farmhouse Cheddar. There are a few steps involved in making the cheese, but it's not hard, it's just time consuming and requires more patience then anything - we made this cheddar in mid-September and it's just ready to try now! The cheddar was actually ready to try last weekend, but Mr B and I have been dancing around it for the last week because whilst we were both excited, we were also terrified that when we cut it open it would be blue or that it would taste disgusting. Anyway, with all the talk of tornadoes and the fact that we were locked inside going crazy today, we decided to bite the bullet and try our cheese. I cut a small wedge out of the 1kg round of Cheddar (with my eyes closed....) and Mr B and I both had a small tentative nibble....our eyes widened and there was blissful silence as we scrambled around gathering biscuits and scoffing cheese - it was delicious! And it actually tasted like cheddar!! 

Let me show you some pictures of our cheese making journey! 


The cheese all made and ready to air on the bench for a few weeks.


Mr B coating the cheese in wax. 


6 weeks later.....the finished product! 


1kg of delicious, creamy, home made cheddar cheese! 

I still can't believe we made it ourselves!! At the moment we have some camembert ageing as well so fingers crossed that comes out just as good! 

Mrs B xx 

Monday, November 5, 2012

Waffles with Strawberries, Banana and Cream

On a Monday you need dessert. End of story. But dessert doesn't always have to consist of ice cream straight from the tub or indulgent chocolate puddings or decadent cheesecakes, dessert can consist of fruit and still be satisfying and delicious....don't believe me....check these waffles out and tell me I'm wrong. 


This recipe makes 2 of the waffles shown in the picture. 

.6 cup of plain flour
.6 tspn baking powder
1 tbspn caster sugar
1 egg
1/2 cup milk
30g butter, melted
1/2 cup strawberries sliced
2 small bananas sliced
whipped cream

Pre-heat your waffle maker.

Combine the flour, baking powder and sugar in a mixing bowl.

Stir through the egg, milk and melted butter.

Pour half of the mixture into your waffle maker, close the lid and cook for 4-5 mins or until golden.

Repeat with remaining mixture.

Serve topped with strawberries, banana and whipped cream.

I just adore banana and whipped cream and with the addition of strawberries and a freshly cooked golden waffle, it is the perfect dessert. I also love that it's a lovely light way to end a meal, plus it looks really specky so it makes you feel like you are indulging in a decadent dessert without leaving you with that heavy 'oh i've over eaten' feeling!

Enjoy!

Mrs B xx

Sunday, November 4, 2012

Strawberry Cheesecake Slice

This weekend Mr B and I discovered 'Click and Collect' groceries which basically is where we can do our groceries online and collect them the next day at no extra cost! Every weekend I get increasingly frustrated at the amount of time it takes to do the shopping list, go to the supermarket, pick everything up, come home and unpack, but I did have some concerns regarding the freshness and quality of the goods we could receive, so on Thursday night, Mr B and I sat down and did our order online and when we rocked up at the supermarket after work on Friday, there were our groceries all ready to go! We were really impressed, the fruit and vegies were all good quality and everything was well packed, plus it has made such a HUGE difference to our weekend! We have had so much extra time which equals lots less stress and lots more quality time. It has been fantastic!

And to celebrate, I made Mr B one of his favourite snacks for his lunches this week.....Strawberry Cheesecake Slice!


You will need

1 packet of Lattice Biscuits
125g of cream cheese
125g butter
1/2 cup caster sugar
4 tbspns strawberry jam
2 tspns gelatine
1 tspn vanilla essence

In the bowl of an electric mixer, combine the cream cheese, sugar and butter. Beat until smooth, creamy and pale.

Dissolve the gelatine in 1/4 cup of hot water and add to the cream cheese mixture with the strawberry jam and vanilla. Beat until thick and creamy.

Line a baking dish with baking paper and then layer half of your lattice biscuits, shiny side down, in the dish.

Spoon the cheesecake mixture over the top of the biscuits and smooth with the back of a spoon or a spatula.

Top with the remaining biscuits and refrigerate for 3-4 hours or overnight.

Cut into squares and serve!

Anyway, I best be off, I have Apple Pikelets cooking away and I need to get ready because tonight Mr B and I are kicking off a month of celebrations for Mr B's birthday (against Mr B's will, but I love any excuse to celebrate!). We are heading out to dinner and then to a Johnny Cash Tribute Show so it should be a really good night....not to sure how we will go at work tomorrow, but we will worry about that later!

Mrs B xx

Thursday, November 1, 2012

Nutella Stuffed Pikelets

I have been promising Mr B I would make him these Nutella Stuffed Pikelets for weeks now and over the weekend I finally got around to making them. I always see things I want to make so I say to Mr B 'Oh how about this weekend I make this for your lunches?' and he gets all excited and in the meantime I've seen a bazillion other things I want to make and well sometimes the things I promised to make this weekend, don't get made for like quite a few weekends! Anyway, I now have one very happy husband which equals peace and quiet which equals one very happy wife!


For these Nutella Stuffed Pikelets you will need:

1 cup self raising flour
1/4 cup caster sugar
1/4 tspn bicarb soda
1 egg
3/4 cup milk
1 tspn white vinegar
15g butter, melted
Nutella

Place the flour, sugar and bicarb soda into a bowl. Make a well in the centre and add the egg, milk and vinegar and butter. Stir, or beat using an electric mixer, until smooth.

Now here is where I use my pancake maker, but I imagine it's not too different to using a fry pan heated to medium heat and lightly greased with butter.

Drop tablespoons of batter into the frypan (or pancake maker!). When bubbles start to appear, place a teaspoon of nutella in the centre of each pikelet and top with a tablespoon of batter, ensuring nutella is totally covered. Carefully flip pikelets over. They should only need another minute or so and they will be done! Repeat with remaining mixture and nutella.

This recipe makes around 15-20 pikelets depending on the size you make them and how much batter you eat in the process!

These are great freshly cooked when the nutella centre is all gooey and warm, but they are also great cold which makes them fantastic lunch boxes treats!

Mrs B xx

LinkWithin

Related Posts Plugin for WordPress, Blogger...