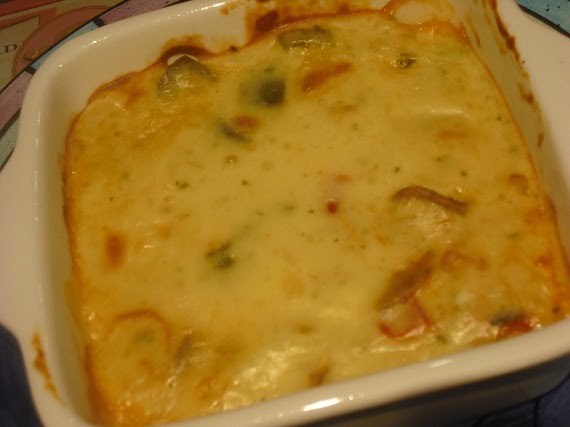
Ok so I forgot to take a photo....
It may be because tuna chow mein is one of my favourite dishes....
It may be because I was starving hungry....
It may be because I was slightly excited about passing my motorcycle learners only a few hours earlier...
Whatever the reason, I still forgot and I apologise.
Let me make it up to you by giving you the recipe to create this delicious dish for yourself :)
You will need:
1/2 cabbage diced
2 small tins of light tuna
1 tin of baby corn cuts
1 red capsicum diced
1 onion diced
1 carrot diced
2 tspns curry powder
225g pineapple pieces drained
1 pkt oriental flavoured noodles
Brown your onion in a fry pan over medium heat. Add curry powder and cook for 2-3 mins or until fragrant.
Add in cabbage, corn cuts, capsicum, carrot, broken up noodle cake and flavouring sachet and 2-3 cups of water. Place the lid on the fry pan and allow to simmer for 20 mins stirring occasionally.
After 20 mins add in the tuna and pineapple and mix in well.
Allow to simmer for another 10-15 mins or until the cabbage is cooked and soft, the majority of the water should have been absorbed.
OH and I get two large bowls and one small bowl for the next days lunch out of this recipe :)
It is a great hearty winter dish and it's low in cals!! It's also my Mum's recipe and one of my favourite dishes from when I was little so I hope you all enjoy it as much as I do!
Em x

Wednesday, May 11, 2011
Monday, May 9, 2011
Fresh Cinnamon Bread for Breakfast Anyone??

Ok so I know this recipe is on every food blog you read lately but that is because a) it's delicious and b) everyone wants to see if they can actually pull it off.

I have to admit I did want to see if I could pull it off, but I also thought it would be the perfect breakfast to dish up to Mum on Mothers Day but I had a dilema....everyone seemed to be saying that you could let it rise overnight at the first rise...but that would mean in the morning I would have to roll it out, spread with butter and sugar, cut it up, arrange in the pan, let it rise for 30 mins, bake for 40 mins and then sit for 20 mins before I dished it up...and subsequently get out of bed at like 5am....well not this lil black duck I tell you!! So I fiddled and played and this is my version of the Cinnamon Pull Apart Bread that allows you to still be snoozing in bed an hour before it hits the table!

Overnight Cinnamon Pull Apart Bread
For the Dough:
2 3/4 cups plus 2 tablespoons plain flour
1/4 cup caster sugar
7g yeast (about 2 1/4 tspns)
1/2 teaspoon salt
60g butter
1/3 cup milk
1/4 cup water
2 large eggs, at room temperature
1 teaspoon pure vanilla extract
For the Filling:
1 cup caster sugar
2 teaspoons ground cinnamon
60g butter
In a large mixing bowl combine 2 cups flour, sugar, yeast, and salt. Set aside.
In a small saucepan or in the microwave melt together milk and butter until butter has just melted. Remove from the heat or microwave and add water and vanilla extract. Let mixture stand for a minute or two, or until the mixture registers 115 to 125 degrees F (I used my candy thermometer for this).
Pour the milk mixture into the dry ingredients and mix with a spatula or with the dough hooks of your electric mixer. Add the eggs and beat until ingredients are just combined. It will seem like the dough is not very 'doughy' at this stage but stick with it and keep stirring. Add the remaining 3/4 cup of flour and beat for about 2 minutes. Don't panic....the mixture will be sticky. You have done well grasshopper.
Place the dough in a large, greased bowl (I just left mine in the mixer bowl...) and cover with plastic wrap and / or a clean kitchen towel. Place in a warm spot and allow to rest until doubled in size, about 1 hour.
While the dough rises, combine the filling ingredients in a jug or small saucepan and heat until melted. I microwaved mine for about a minute so that the butter was melted and just gave it a good stir. Set aside to cool.
Grease a 9x5x3-inch loaf pan and set aside.
Once the hour is up, deflate the risen dough and knead about 2 tablespoons of flour into it. On a lightly floured surface, use a rolling pin to roll the dough out. The dough should be 12-inches tall and about 20-inches long but who has time to get the ruler out when they are baking...so just roll it out into the biggest rectangle you can.
Use a pastry brush or the back of a spoon to spread the melted butter and sugar mix over the dough. Try and cover the whole surface.
Slice the dough vertically into six equal-sized strips and stack them on top of one another. It will get messy but you will be fine, carry on. Slice the stack into six equal slices once again. Layer the dough squares vertically in the loaf pan kinda like your assembling a choc ripple cake. Place some cling wrap loosely over the pan and place in the fridge. Go to bed and rest...you've earnt it.
Now you need to get up about an hour before you want to put your bread in the oven and take it out of the fridge so it can come back to room temperature. Whilst your up you may as well put the oven on to 180C as well :) Make yourself a cup of tea and go back to bed for an hour.
Tick tock....ok so your hour has passed, sit the loaf tin in a baking dish (incase your sugar mix overflows...which it may very well do) and bake for 35-40 mins. It should be a deep golden colour when done. A nice, dark, golden brown will ensure that the center is cooked as well.
Remove from the oven and allow to rest for 20 to 30 minutes. Run a hot knife around the edges of the pan to loosen the bread and tip out onto a clean board or tray. Place a cake stand or platter on top of the upside down loaf, and carefully flip so it’s right side up. Serve warm with coffee or tea and enjoy!
This bread is just a dream come true, we were all raving about it at brekkie, the bottom is all gooey and sticky, the bread itself is light and fluffy and swirled with cinnamon goodness and it just pulls apart so easy!
I know the recipe looks long and I know some people (like me) are scared of yeast, but honestly, try it, it will change your life or at the very least brighten your morning plus your house will smell of cinnamoney goodness for days and really isn't that reason enough?!
Oh and before I go, here are some shots of OH and I and Mum and Dad at Pancakes By The Pond for Mothers Day lunch :)


Em x
Sunday, May 8, 2011
Happy Mothers Day!
So we all have Mothers yes?
We all love them to pieces and want to spoil them yes?
Stuck for ideas on the best way to spoil your Mum tomorrow?
How about these Monte Carlo Biscuits?

Look impressive don't they?
Here's how it's done :)
You need:
125g butter
1/3 cup brown sugar
1 tspn vanilla
1 egg
3/4 cup of self raising flour
1/2 cup plain flour
1/3 cup coconut
1/2 cup strawberry jam
And for the buttercream you will need:
60g butter
3/4 cup icing sugar
1/2 tspn vanilla essence
Preheat the oven to 160C fan forced and line 3 trays with baking paper.
Beat together the butter, sugar and vanilla essence until light and fluffy. Add egg and beat until combined.
Sift flours over the butter mixture and beat well. Stir in coconut.
Roll heaped teaspoons of mixture into balls and place on trays 3cms apart. Using a fork lightly flatten each ball to 1cm thick.
Bake for 12-15 mins or until lightly golden. Stand on trays to cool for 10-15 mins.
While the biscuits are cooling you can make the buttercream - Beat butter, sugar and vanilla until light and fluffy.
Spread half of the biscuits with the butter cream and spread the other half with the jam. Sandwich together and serve :)
I made a big batch of these last night and will be giving them to all the Mum's at the family lunch today.
So I hope all you Mum's out there are thoroughly spoilt today, brekkie in bed, a nice sleep in, champagne in the bath and at the very least, a plate of home made Monte Carlo biscuits :)
And to my Mum.... we may have our differences, but you are always there for me when I need you, you listen to my ramblings, you go along with my phases, you look after me, you made me who I am today and I love you dearly xx
HAPPY MOTHERS DAY!!
Em xx
Saturday, May 7, 2011
Pineapple Self Saucing Pudding

It looks good doesn't it.
Granted I should have got a photo before OH attached it with cream and ice cream but you know it looks good, you know that pudding is hot and golden and delicious and you know that the first spoonful you have will be filled with light fluffy pudding, thick pineapple sauce and a hint of cream and it's just going to make you all fuzzy inside :)
So this is how it's done!
Pineapple Self Saucing Pudding
1/2 cup dessicated coconut
1 tspn lemon juice
1/2 cup caster sugar
3 eggs (seperated)
2 tbspns self raising flour
1 large can of pineapple pieces drained
1 cup milk
60g butter
In the bowl of an electric mixer combine the butter, sugar, lemon juice and egg yolks. Beat until thick and creamy. Slowly add in the flour, milk and coconut. Beat until combined. Stir in the pineapple.
Beat the egg whites until stiff peaks form and fold into pineapple mixture.
Pour into an oven proof dish and bake at 160C for 40 mins or until firm.
Dust with icing sugar if desired and serve with cream.
I have never made a cake / pudding that has so little flour in it and relied pretty much on the egg whites but oh my goodness, it was so light and fluffy. The pineapple sauce was thick and delicious and the addition of coconut to the mix made this pudding a true tropical delight!
Hope you're all enjoying your weekend!
Em x
Thursday, May 5, 2011
Women's Weekly Recipe Card File Challenge!
A few weeks ago my Mum was clearing out her recipe books and offered me her Women's Weekly Card File. I can't tell you how happy I was, I remember playing with this when I was little, pulling out all the cards, looking at the pictures and putting them all back in the wrong order! My Mum has had this card file since 1973 and she collected all the cards in it during some promotion that Women's Weekly held but only ever made the Pumpkin Scone recipe from it (and I have to say they are damn good pumpkin scones) so I think she was happy to pass it onto someone who was a) very excited about it and b) would put it to good use. So when Mum and Dad came for tea on Tuesday night I had to cook something from the card file!

Italian Rice Slice
Base - 30g butter
1 onion diced
1 cup brown rice
1 egg lightly beaten
3 cups water
Combine the rice and water and cook in the microwave or on the stove for 30-40 mins (or until soft)
Melt the butter in a frypan over medium heat and cook onion until soft and golden.
Once rice is cooked, stir through onion and egg.
Press into the base of 4 individual ramekins or one big baking dish.
Filling - 60g butter
1 red and 1 green capsicum diced
200g sliced button mushrooms
1 onion diced
3 tomatoes finely chopped
1 tspn crushed wet basil
In the fry pan you just used for the base, melt butter and add onion.
Cook until golden and soft. Add remaining vegetables and basil. Cook for around 10 mins or until vegetables are tender.
Arrange vegetables over your rice base.
Topping - 40g butter
1/4 cup plain flour
1 cup milk
1 egg lightly beaten
60g light shredded pizza cheese
.5 tspn crushed wet basil
Melt butter in a saucepan. Remove pan from heat and add flour. Stir until smooth. Return to heat, stirring constantly for 2 mins.
Remove from heat and gradually add milk. Stir until smooth. Return to heat, stirring until mixture boils and thickens. Remove from heat and add beaten egg, cheese and basil. Stir until cheese melts (this will require some muscle power!).
Pour mixture over vegetables and bake in oven at 160C for around 40 mins or until topping is golden and set.

Ohhhhhhhhhhh my god, how awesome was this! I know it seems a bit fiddly with having to prepare 3 different layers but honestly, try it, you won't regret it! The cheese sauce was devine, the vegetables had so much flavour and the brown rice base just pulled it altogether beautifully. Definetly a keeper!
There are so many fantastic recipes in there, Mum and Dad have set me a challenge to try and cook them all so I'm going to aim for at least one dish a week and see how we go!
Em x

Italian Rice Slice
Base - 30g butter
1 onion diced
1 cup brown rice
1 egg lightly beaten
3 cups water
Combine the rice and water and cook in the microwave or on the stove for 30-40 mins (or until soft)
Melt the butter in a frypan over medium heat and cook onion until soft and golden.
Once rice is cooked, stir through onion and egg.
Press into the base of 4 individual ramekins or one big baking dish.
Filling - 60g butter
1 red and 1 green capsicum diced
200g sliced button mushrooms
1 onion diced
3 tomatoes finely chopped
1 tspn crushed wet basil
In the fry pan you just used for the base, melt butter and add onion.
Cook until golden and soft. Add remaining vegetables and basil. Cook for around 10 mins or until vegetables are tender.
Arrange vegetables over your rice base.
Topping - 40g butter
1/4 cup plain flour
1 cup milk
1 egg lightly beaten
60g light shredded pizza cheese
.5 tspn crushed wet basil
Melt butter in a saucepan. Remove pan from heat and add flour. Stir until smooth. Return to heat, stirring constantly for 2 mins.
Remove from heat and gradually add milk. Stir until smooth. Return to heat, stirring until mixture boils and thickens. Remove from heat and add beaten egg, cheese and basil. Stir until cheese melts (this will require some muscle power!).
Pour mixture over vegetables and bake in oven at 160C for around 40 mins or until topping is golden and set.
Ohhhhhhhhhhh my god, how awesome was this! I know it seems a bit fiddly with having to prepare 3 different layers but honestly, try it, you won't regret it! The cheese sauce was devine, the vegetables had so much flavour and the brown rice base just pulled it altogether beautifully. Definetly a keeper!
There are so many fantastic recipes in there, Mum and Dad have set me a challenge to try and cook them all so I'm going to aim for at least one dish a week and see how we go!
Em x
Tuesday, May 3, 2011
Chunky Chocolate Ginger Slice
Do you ever have those days where you just need to remove yourself from everything?
Of course you do.
Everyone does.
And yesterday I had one of those days. Normally when I get home from work I put my bags in my room, make my lunch for the next day, go for a walk or put my pjs on, do some chores and get dinner on the go. But not last night. Last night I got home from work, left my bags at the front door and headed for the kitchen. I didn't bother getting changed, I didn't bother doing anything I would normally do, I just wanted to bake. And bake I did. I was in that kitchen for 3 hours straight and the time flew. I didn't feel rushed, I wasn't flustered, it was just me and my cooking and I was so peaceful.
One of the goodies that came out of the kitchen last night was a Chunky Chocolate Ginger Slice

I doubled the recipe and made half in cupcake form to take to work and half as a slice (easy for OH and my Dad to take to work).
The end result was a gorgeous dense ginger cake and whilst initially you do get a bit of a chocolate hit they do leave you with that beautiful gingerbread taste in your mouth. I think maybe next time I would go with slightly less chocolate and more ginger though, although that could just be because at the moment I have a cold and my taste buds have desserted me...
For this delicious slice you will need:
3/4 cup brown sugar
1/3 cup golden syrup
100g butter
2 eggs lightly beaten
1/3 cup milk
100g white choc bits
100g dark choc bits
1 cup self raising flour
1 cup plain flour
2 tspns ground ginger
Pre heat oven to 160C fan forced and grease and line a slice tin.
Combine butter, brown sugar and golden syrup in a jug and microwave for 30-40 seconds until all ingredients are melted together. Set aside to cool.
In a bowl combine choc bits, flours and ginger.
Once butter mix has cooled, add eggs and milk and stir to combine. Pour over dry mix and stir well.
Pour the mixture into prepared slice tin and bake for 25 mins.
Now don't you feel relaxed? Like the weight of the world has been lifted off your shoulders? Don't you love just losing yourself in your cooking? I know I do.
Now sit down with a cup of tea and a piece of chunky chocolate ginger slice fresh out of the oven (coz you just know the chocolate bits will be all melty and gooey) and put your feet up. Go on. You deserve it!
Em x
Sunday, May 1, 2011
Bridal Knees Up!
I have always worked with men, men who swear, men who drink beer, men who don't organise social gatherings and even if they did they wouldn't invite me incase the presence of a girl upset one of their wives....so last November when I began my new job and it was in an office full of women I was a little unsure of what to expect....would they be catty? bitchy? would it be like school with the popular girls and the not so popular? do we go out for lunches and coffees and discuss our shoe collections? I really had no idea and I must say I have been more then pleasantly suprised. It has been like walking into a little family, being the youngest it is almost like having a group of extra mothers. They have accepted me with open arms and made me feel more welcome then I did after 4 years in my previous job. So last week when I got invited to a joint hen's night for two of the ladies I was a bit dubious, but then I looked at all the smiling excited ladies around me and I was sold...and a touch excited too!
The invite for the hen's night called it a Bridal Knees Up and stated that each guest was to bring either nibbles or a dessert, a torch, some small change, warm clothes, something from your own wedding and your champagne. Apparently start and finish was at the same location but sometime in between we would be jumping on a bus and terrorising the city. It sounded fantastic! Two of the ladies at work organise something similar whenever one of the girl's gets married - they even said they would do one for me before our January nuptuals!!
Anyway, last night I rugged up in my warm clothes, put new batteries in my torch, checked my wallet wasn't empty and raided the fridge for something alcoholic and set off on my merry way for my first Bridal Knees Up!
When we arrived, those who brought desserts were allowed to leave them inside and everyone else crammed onto the bus to start our adventure. It was pitch black dark, but everyone was in good spirits with champagne corks being popped left, right and centre. We set off on our merry way and the bus just drove round and round and round until we were all totally disorientated, the bus was full of whispers about where we were going and what we were doing, mixed with random singing and laughter...and then we saw it...the bus slowed down and pulled into a paddock and there in the middle of the paddock was a huge bonfire surrounded by tables and chairs. This was our nibbles stop! We stayed here for awhile, eating our way through biscuits, cheeses, dips and pastries and drinking our way through numerous bottles of champage, cameras were flashing, ladies were laughing and the fire was roaring, it was fabulous! But all too soon we were back on the bus and off to our next destination. As we headed over the river and away from town there were whispers of restaurants and secret locations...and when the bus pulled up at a dark desserted oval we weren't entirely sure what was going on! This was a games stop and we had a three legged relay race, it was hilarious, each of the bride's picked a team, but to be honest no one was taking it too seriously - my team may have cheated slightly - but we still lost!! Back on the bus for more singing and dancing in the aisles while we waited for our next destination...by this stage we were all starving so desperately hoping it was the dinner stop! Eventually we pulled into the Taroona Lounge Bar (known for its wood fired pizzas!) and I have to say there was nearly a stampede getting off the bus and in the door! Seeing as our final stop was dessert, one of the ladies from work and I decided to share a bowl of wedges and a bowl of roast vegies....OMG the vegies were heaven, mushies, broccoli, capsicum, zucchini, tomato, potato, pumpkin and sweet potato all cooked to perfection! As quickly as we arrived we were off again, this time it was back to where we started for the final (and most important) stop - DESSERT!! My god, the table was a sight to behold, there was a sponge with a layer of cream so thick I could barely take my eyes off it, cheesecakes, caramel cups profiteroles, a devine version of Donna Hay's chocolate squishy cake and my lil dessert cups! When we were asked to bring a dessert I started thinking about what would be required...something easy to eat, something light, something delicious and something that would suit all tastes...and this is what I came up with:

Strawberry Cheesecake Pots and Brownie and Chocolate Mousse Pots
Aren't they adorable! And they went really well, out of all the desserts these went first, I was so proud! And they were so easy!
For the Strawberry Cheesecake Pots - Combine 500g extra light philly with 200ml thickened cream, 1 small tub of vanilla yoghurt and 1/2 cup of strawberry jam. Spoon into serving glasses and top with crushed up butternut snap biscuits and a single raspberry.
For the Brownie and Chocolate Mousse Pots - Make up a packet brownie and packet chocolate mousse mix as per directions - or you can use your favourite recipes. Break up the cooked brownies and divide between serving glasses. Top with chocolate mousse and 2-3 raspberries.
Easy, simple, light, delicious and transportable!!
I had such a great night at the Bridal Knees Up - it's just such a good idea, like a more civilised version of the traditional hen's night, I can't wait for my own now!
And as for today, OH has been at work all day - 13 hours and counting so far - so I had a sleep in, laid in bed with a white hot chocolate (new favourite hot drink), got up and did some house work, went out and dropped some stuff off at The Salvos, had a gorgeous salad for lunch with OH, did the groceries, made tomorrow night's dinner and some risotto so I can make risotto balls for OH's and now I'm full on slothed out on the couch awaiting the boy's arrival so we can have bikkies and cheese for tea!
Hope you all had a fantastic weekend :)
Em x
Subscribe to:
Posts (Atom)