Monday, September 9, 2013

Another Year....

Well there was no denying or avoiding it, yesterday was my birthday - honestly it seems to come around far too quickly because I feel like I say that alot, but in all honesty, I don't mind because I know I'm going to get to spend the entire day with Mr B and my Mum and Dad and, to me, that is the best gift of all.


 Yesterday morning Mr B and I had the opportunity for a bit of a sleep in seeing as we weren't due at Mum and Dad's for breakfast until 10am, although that didn't stop me being awake at 7am poking Mr B in the ribs whispering 'It's my birthday!!' until he woke up.....

I was lucky enough to get an early birthday present from Mum and Dad a few days ago which solved all my wardrobe dilemnas because they had brought me this super gorgeous retro dress to wear yesterday - I love Love LOVE it and felt like some sort of vintage princess all day in it.


After a quick photo shoot, Mr B and I headed to Mum and Dad's for breakfast. I'm sure Mr B was holding out hope for eggs and bacon, but Mum and Dad know me well and dished up this beautiful Poached Spiced Dried Fruit with Spiced Honey Yoghurt - it was absolutely divine and I could easily have eaten bowl after bowl of it....except Mr B polished off the leftovers before anyone else got a look in!


Poached Spiced Dried Fruit with Spiced Honey Yoghurt - Serves 4
1/2 cup brown sugar
1.5 cups water
grated rind of 1 lemon
2 cinnamon sticks
1 vanilla bean - split lengthways and scraped
400g dried fruit (apricots, apples, pears and dates)

Combine sugar, water, lemon rind, cinnamon sticks, vanilla bean and scrapings in a saucepan over medium high heat and bring to the boil. Boil for 3 mins.

Add the dried fruit. Cover. Reduce heat to low and cook for 45 mins, stirring occasionally or until fruit is plump and tender. Serve fruit warm with syrup and yoghurt.

To make the yoghurt, combine 500ml thick greek yoghurt with 1-2 tspns of honey and cinnamon to taste.


After breakfast we headed into town for a spot of window shopping. Earlier this year a Peter Alexander shop finally opened up in Hobart and I have been dying to go in for a browse. I have never actually brought myself any Peter Alexander pyjamas because I have issues spending more then $10 on anything I'm going to just lounge around in and most likely spill my dinner on before I go to sleep, but that doesn't mean I don't love looking at them!

Mum and I browsed in and out of every sale rack we could find and if it all got too girly and lingerie related, Mr B and Dad hung around outside the store trying their best not to look suspicious....

I felt bad for them loitering around out there so told Mum to go and get them.....but when they came into the store they didn't like anything I tried on so they were quickly sent back outside!

As it turns out the sale racks had to wait because unbeknownst to me, we had a lunch date!


As soon as we drove down into Salamanca Place I started thinking 'please let us be going to Jack Greene's, please let us be going to Jack Greene's.....' 

And we did! Yay!!! It was right on 1pm rush hour though so we were informed it was a 50 minute wait for food but we managed to survive that by playing musical tables around the restaurant. The third table we tried was not too breezy, not too small, just right and just in time for our meals to arrive!!


Mr B ordered his beloved mini burgers. Last time we were here we discovered that they have a sample plate where you can pick any 3 mini burgers so I think this time Mr B decided to try the blue swimmer crab, the wagyu beef and the duck - of course he said they were all awesome, but I just love them because they are so tiny and adorable!!


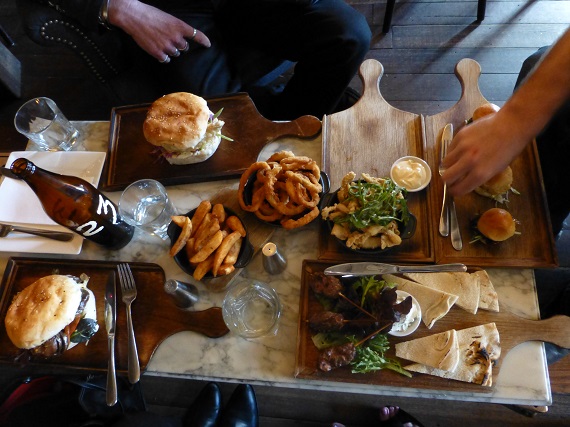
Mum ordered a vegetarian burger with balsamic mushrooms, grilled halloumi and eggplant relish which looked delicious and had a piece of halloumi the size of my head in it - I'm so having that next time we go!! Dad had a battered fish burger, I had the lamb and halloumi koftas with grilled flat bread and we all shared some chips and onion rings.....next time we go I'm also getting a bowl of the chips and onion rings just for myself, no sharing, they are that good and whatever they were seasoned with is pure gold.


Bellies full, it was time to head home for a nap presents.

I got absolutely spoilt by Mum and Dad with some beautiful new jewellery, including a pink pearl necklace and tree of life pendant, and some pretty new scarves to add to my growing collection! 


I also got this handy dandy lingerie travel case.....I think Mr B likes it a little too much....


And what birthday of mine would be complete without shoes?!

Nearly 3 years ago now, Mr B discovered this giant shoe sculpture in a paddock on his way home from his buck's weekend. Then last year on my birthday, Mum, Dad, Mr B and I stumbled upon the artist's miniature version for sale in a local gallery....and now look at them right here in my lounge room!

Cue lots of squealing and general awe on my behalf. LOVE!!!


Now I think Mr B and my parents conspired on this next part which normally would bother me, but on this occasion I think it worked out very much in my favour so I'm prepared to let it slide!

Mum and Dad brought me a brand new mixer! And whilst my old mixer is only 4 years old, I do use it flat out and it probably feels like it is about 60....

Plus there was that time I put the stainless steel mixer bowl in the microwave to soften some cream cheese...

And that other time I got a spoon wrapped around the beaters....

Ok so it's had a fairly hard life in it's 4 years and is probably due for retirement / downgrading to light duties which it can do now that I have my brand spanking new swish shiny (and did I mention blue??) mixer!


Here is where the conspiring comes in because Mr B brought me this Wilton Decorating Tool Caddy!

Cue more excited squealing and then lots and lots of babbling as I tried to verbalise all the things I could make in my new mixer and then decorate with all my new toys.....so many ideas so little time!!

I have looked at these decorating tool caddys and ooohhh'd and aaahhh'd over all the goodies in them and walked the appliances aisles at the electrical stores day dreaming about a whiz bang new mixer many times, but I never thought I would be lucky enough to own not one, but both of them.


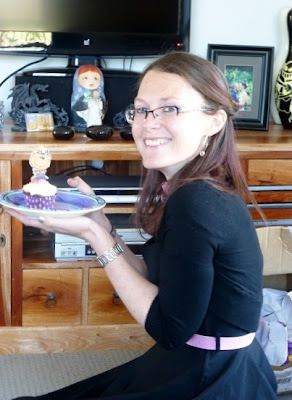
My Mum whipped up some delicious chocolate and vanilla cupcakes, complete with pirate candle at Mr B's insistence, for afternoon tea.

When this photo was taken I had Dad in front of me with his camera, Mr B to the side of me with our camera and there were flashes going off left right and centre, I didn't know which way to look or to smile and was more concerned that my candle had been burning for so long the pirates head was going to melt all over my cupcake!


After Mum and Dad went home, Mr B told me he had to spend some time in the kitchen getting my 'cake' sorted out so I took the opportunity to put some of my presents away, throw on one of my new CD's and put my feet up.

Although I did think it was slightly odd when Mr B asked me if I felt like sweet or savoury and when I said I didn't mind he said he would just do half and half......

About an hour later when Mr B emerged from the kitchen singing Happy Birthday he was carrying this enormous platter full of fresh scones - one was even complete with birthday candle!!

It was only last week on Fathers Day that I complained loudly to Mum, Dad and Mr B about how much I was hanging out for some good fresh scones with jam and cream and how you couldn't find many places that actually had them on the menu anymore. As it turns out, Mr B was listening!

 Half of the scones were plain and half were cheese and it didn't take long for the butter, jam and cream to appear. These were delicious and after a day that seemed to be full of food, a much lighter all-in-one dinner / dessert!


Basic Buttermilk Scones - 2 ways

2 cups self-raising flour
1 tablespoon caster sugar
Pinch of salt
60g butter, chilled, chopped
3/4 cup buttermilk
1/4 cup grated cheese
Extra buttermilk, for brushing
Butter, Strawberry jam and whipped cream, to serve

Preheat oven to 220°C/200°C fan-forced. Line a baking tray with baking paper. Position oven rack in the top half of oven.

Sift flour, sugar and salt into a bowl. Add butter. Using fingertips, rub butter into flour mixture until mixture resembles fine breadcrumbs.

Make a well in centre of mixture. Add buttermilk. Using a flat-bladed knife, stir until a sticky dough forms. Turn out onto a lightly floured surface. Knead gently until just smooth. Divide dough in half.

To one half of the dough mixture, add the cheese and gently work through the dough.

Using a lightly floured rolling pin, gently roll out each portion of dough out until 2cm thick. Using a 6cm round cutter, cut out scones. Press leftover dough together. Repeat to make 12 scones.

Place scones, just touching, on prepared tray, making sure to seperate your plain and savoury ones.

Brush scones with buttermilk and bake for 12 to 15 minutes or until golden and hollow when tapped on top. Serve the plain ones with jam and cream and the savoury ones with butter and if you have cheese and tomato relish floating around, they are pretty good with some of that too!


So there you have it.

That was my birthday.

And I loved every single second of it spent with my amazing family who I would be lost without. Thank you all for just being you xx

Enjoy!!

Mrs B xx

Saturday, September 7, 2013

Chocolate Profiteroles

I love this time of year.

The dreary winter days are slowly replaced by beautiful warm spring sunshine and the gardens and road sides are dotted with bright bursts of colour, my favourite of which would have to be the daffodils.

Don't they just personify spring and all things warm and sunny??


This week based on some recent success stories with recipes I have previously been too scared to try, I decided to tackle the humble profiterole.

Everyone loves profiterole and as a dessert you just can't go wrong with them, plus they are super versatile.

Seeing as this was my first attempt I wanted to stick to the classic cream filled and chocolate topped version. But before I could even think about that, I had to conquer making choux pastry.

I prepared myself for epic failure, I gave myself plenty of time to re-make the mixture when the first one went horribly wrong.....and you know what? It was actually super easy, I'm not really sure what I was so concerned about and now I'm keen to tackle it in it's other forms....chocolate eclairs anyone?!

Basic Choux Pastry

40g butter, chopped and at room temperature
1/3 cup plain flour
1/3 cup water
2 eggs lightly whisked

Place water and butter in a medium saucepan and bring to the boil over high heat. Remove from the heat and add the flour. Stir to combine.

Place flour mixture back over moderate heat and stir for 1-2 mins or until mixture forms a ball and comes away from the sides. Set aside for 5 mins to cool slightly.

Transfer mixture to the bowl of an electric mixer and gradually add eggs, beating well after each addition until you have a smooth glossy paste that holds its shape when you lift the beaters.


Chocolate Profiteroles - Makes 12

1 quantity of basic choux pastry
200g milk chocolate melts
300ml thickened cream
1 tbspn icing sugar
Strawberries to serve

Pre-heat oven to 180C and line a baking tray with baking paper.

Spoon the pastry into a piping bag fitted with a 1.5cm plain nozzle. Pipe 12 balls onto your prepared tray leaving room for spreading. Try to pipe them so that they have some height.

Bake for 20-25 mins or until puffed and golden. Do not open the oven door during the cooking period.

Once the profiteroles are cooked, remove from the oven. Turn the oven off. Using the tip of a sharp knife or a skewer, pierce the base of each profiterole to release the steam. Place back on the tray and in the oven with the door slightly ajar for 10 -15 mins. Remove from the oven.

Did you know that the water in the dough turns to steam during the cooking process which is what causes the profiteroles to puff up and essentially be nice and hollow for filling? Ok so you probably did, but I didn't - I learnt so much whilst making these! Ok back to the cooking now....

Place chocolate, 1/3 cup cream and 1/3 cup water in a bowl and microwave for 30 seconds on high, stir until melted and smooth.

Beat the remaining cream and icing sugar until stiff peaks form. Spoon the mixture into a piping bag fitted with a 1cm nozzle. Using the pierced hole on the base as a guide, fill each profiterole with cream. Serve drizzled with chocolate sauce and fresh strawberries.


I am really happy with the way these these profiteroles turned out. They looked fabulous and tasted divine!

The pastry was gorgeous and light and the explosion of cream when you took your first bite topped with the milk chocolate sauce made for a very special after dinner treat. Oh and the strawberries are for mopping up all the cream and chocolate sauce you've dripped on the plate afterwards!!

Enjoy!

Mrs B xx


Wednesday, September 4, 2013

Zucchini, Cheese and Chorizo Twist


I am ashamed to say that this recipe almost never happened.

It is actually one of the very first recipes I carefully cut out of a magazine, placed in my folder and vowed I would some day make.

But then every time I was flicking through the pages looking for inspiration I just couldn't shake the idea that it looked either difficult or bland and so I passed it over time after time.

Last week I decided to just bite the bullet and try it, if it was no good then at least I knew and if it turned out well then it might encourage me to try some of those other recipes I keep overlooking.

It didn't turn out good.

It turned out super awesome.

I don't know why I thought it might be difficult because it was really quick and easy to throw together and whoever said it looked bland is clearly not thinking straight because between the cheese, the chorizo and the eggs there are so many different flavours going on in this thing it's unbelievable. And so many different things you could do with it too -  next time I'm planning on adding some semi dried tomatoes and fetta to the rice mixture for a mediterranean touch.....but in saying that the original version is pretty damn good and I feel it is going to very hard to beat!


Zucchini, Cheese and Chorizo Twist

3 large zucchini, grated
1 onion, diced
2 tspns crushed garlic
1 cup cooked white rice
1 cup grated cheddar cheese
1/3 cup grated parmesan cheese
1/2 tbspn crushed wet basil
2 sheets shortcrust pastry
100g chorizo slices
3 hard boiled eggs, peeled and halved
Milk

Pre-heat oven to 200C / 180C fan-forced. Grease and line a large baking tray.

In a frying pan over medium high heat, combine the onion and garlic and cook for 2-3 mins or until onion has softened.

Add the zucchini and cook for 3-5 mins, stirring regularly. Drain any excess liquid from the pan.

Combine the rice, cheeses, basil and zucchini mixture and season with salt and pepper.

Place the two sheets of pastry on the prepared tray, overlapping about 4cm. Gently press pastry together to seal.

Arrange the chorizo in the centre of the pastry leaving a 7-8cm border on all sides.

Spread half of the zucchini mixture over the chorizo. Lay the hard-boiled eggs over the zucchini mixture in a line down the centre. Top with the remaining zucchini mixture.

Using a sharp knife, make cuts in the pastry on the long sides surrounding the filling at 2cm intervals.

Start by bringing the ends of the pastry up to enclose the filling and then bring alternating strips up and over to enclose completely.

Brush with a little bit of milk and bake for 30 mins or until golden.


And say hello to delicious-ness!

This was equally good cold - I may have had a nibble straight out of the fridge - so I think it would also make a great addition to a picnic basket!

Enjoy!

Mrs B xx

Monday, September 2, 2013

Fathers Day 2013 and Lemon Melting Moments

Normally the weekend would have gone by in the blink of an eye, but this weekend we actually managed to squeeze in a fair bit of rest and relaxation so for once, it's Monday morning and I am feeling refreshed.

That may have something to do with the fact that it's 9:20am and I'm still in bed and not at work but let's not go into that right now.

Yesterday was Fathers Day so Mr B and I were up bright and early because Mum and Dad were coming over for breakfast. Mr B treated Dad to his famous mexican eggs and bacon, complete with lime tomatoes and avocado and Mum and I settled for simple avocado and tomato on buttery toast which I have to say was absolutely delicious!


After breakfast we headed off to visit Dad's Dad, Mum's Dad and Mr B's Dad who are sadly no longer with us, but each Fathers Day we visit them all and leave them some flowers. It makes me especially grateful to still have my Dad with me and reminds me not to take that for granted.


Our next stop was The Court of Petty Sessions Cafe in Franklin for lunch. Mr B and I fell in love with this little cafe on our recent trip down for our anniversary and it is an old favourite of Mum and Dad's so we were all glad go back.

The only problem was that EVERYTHING on the menu sounded amazing, I think each of us had at least 3 or 4 dishes we just couldn't decide between so it looks like we will be heading back sooner rather then later!

After lunch we decided to make the most of the gorgeous day and take our full bellies for a walk along the waterfront. It was the first day of Spring and the weather was really turning it on.


By the time we got home it was close to 4pm so it was down to the business end of the day - presents!!

We were all on a bit of a theme this year as since Mum and Dad have moved into their new home, Dad has his first ever real garage so we were on a mission to deck out his bar!

Dad had several sets of postcards that we have given to him as gifts over the years, one of them was a set of black and white photos of the gargoyles of Notre Dame which Mr B and I brought back from our honeymoon and the other was a set of black and white postcards detailing 100 years of Harley Davidson that Mum found in a bookshop.

Mum took the postcards and had them mounted and framed to hang in Dad's shed and I just think the end result is fantastic - talk about one of a kind!


And what bar would be complete without a bar mat?


Or a jukebox??


We helped Dad set some of his new toys up out in the bar and by then we were all fading fast - it had been a lovely day spent with my favourite people, but it was time to go home, have a cup of tea and go to bed.

Each year for Fathers Day I try and make my Dad something edible whether it's a slice or some of his favourite biscuits and this year was no exception. Mum had been dropping hints about Dad missing his favourite melting moment biscuits and seeing as I had never made them before, I thought it was the perfect time to give them a go.

These little biscuits are so simple to make, full of gorgeous lemon flavour and just down right adorable!! 


Lemon Melting Moments

For the biscuits 
200g butter, room temperature
1/2 cup icing sugar
1.5 cups plain flour
1/2 cup cornflour
1 tspn vanilla extract
zest of one lemon

For the filling 
1.5 cups icing sugar
50g butter, room temperature
juice of one lemon

Preheat oven to 150C

In the bowl of an electric mixer cream the butter and sugar until light and fluffy.

Add the vanilla and lemon zest and beat until combined.

Add the flour and cornflour into the mixture and beat until just combined.

Take small portions of the dough and roll into balls, continue until you have 30-40 (I made mine quite small).

Place them on a greased and lined baking tray and gently press on each piece with a fork until it has left an imprint.

Bake for 20 minutes and allow to cool.


For the filling beat the sugar, butter and lemon juice using your electric mixer until smooth. Place small teaspoons of the filling onto the flat side of a cookie and then sandwich together with another cookie that is a similar size and shape. Repeat with remaining filling and cookies. The filling may seem a bit soft but it will set within 15-20 mins of the cookies being sandwiched together.


Only thing that is left to do is put the kettle on, make a cup of tea, sit down and enjoy!!

HAPPY FATHERS DAY DAD!!!

Mrs B xx

Saturday, August 31, 2013

Peppermint Slice

What weekend is complete without some good old fashioned baking?

In this house, it seems every weekend involves some form of baking whether it be a full run of goodies for Mr B's lunches, a cake for someone special or just a batch of bread for us to nibble on, there is always something coming out of our kitchen.

This weekend has also involved long walks in the morning, lazy afternoon naps in the sun, hot cups of tea on the pergola and loads of buttery boston bun and it has been absolutely lovely - every weekend should be like this.

Whilst doing the grocery list the other day, I was telling Mr B about all the things I had decided I would make for his lunches this week.

Mr B piped up and said he had actually been thinking that he would like a Peppermint Slice....

Obviously he meant my Aero Bar Slice, because I remember that being pretty damn tasty.....

But Mr B said No.....

He meant one of those Peppermint Slices with the biscuit base and the white peppermint filling and the chocolate on the top....

I must admit he had me stumped for abit because I hadn't made a peppermint slice like the one Mr B was talking about before but after some time perusing the recipe books we found the one he wanted and I set about giving it a go!

I was really happy with the way this slice turned out and Mr B tells me it tastes just like a home made mint slice biscuit.

The only thing I changed from the original recipes (I was kind of using the base from one recipe and the filling and topping from another one) was to double the filling because Mr B has serious biscuit base to filling ratio issues, other then that it worked out really well and was absolutely delicious!


To make this Peppermint Slice for yourself you will need:

Base
1.5 cups self raising flour
1/2 cup brown sugar
1/2 cup coconut
125g butter

Filling
4 cups icing sugar mixture
100g copha
1/2 cup milk
1 teaspoon peppermint essence
1 drop green food colouring

Topping
180g milk chocolate, chopped
25g butter

Grease an 18cm x 28cm slice pan and line the base and sides with baking paper.

Combine the flour, coconut and brown sugar. Add the melted butter and mix well. Press the mixture into your tin and bake at 180C for 20mins.

To make the filling, place the icing sugar, copha and milk in a microwave safe bowl and microwave on medium for 2 to 3 minutes. Stir until the mixture is smooth and the sugar has dissolved. Add the peppermint essence and food dye. Pour the filling over the prepared base and place in the fridge for an hour or so until set.

To make the topping, place the chocolate and butter in a microwave-safe bowl and heat on medium for 40 seconds. Stir until smooth. If your chocolate starts to seize, add a tiny bit of milk and stir until it comes back together and it smooth and glossy. Spread the chocolate mixture over the filling. Place in the fridge for 3-4 hours or until set.

Slice into squares using a hot knife and enjoy!!

Mrs B xx

Wednesday, August 28, 2013

Pavlova Cheesecake

Over the last few weeks Mum, Dad, Mr B and I have been ramping the dessert wars to new heights.

There have been chocolate tarts, lemon meringue pies and now....just when we all promised to go 'back to basics' for the sake of sanity....we have the Pavlova Cheesecake.


I have to say that when this dessert is placed on the table it certainly does have the wow factor, it just looks spectacular. All the fabulous fresh fruit, whipped cream and crisp meringue you would associate with a pavlova paired with a tart creamy lemon cheesecake - this dessert is an absolute show stopper.


Pavlova Cheesecake

100g plain biscuits
86g butter, melted
500g cream cheese, softened
2 x 395g can sweetened condensed milk
3/4 cup lemon juice

Grease the base and sides of an 18cm round springform tin. Line the base and sides of the tin with baking paper.

To make the base, place the biscuits in a food processor and pulse until fine crumbs form. Add butter and pulse until combined. Using the back of a spoon or a glass, firmly press crumb mixture into base of pan.

To make filling, place softened cream cheese into the bowl of an electric mixer and beat until smooth. Add the condensed milk, one can at a time, beating between additions until combined. Add lemon juice and beat until thick, creamy and smooth.

Pour the filling over the base and smooth the surface. Refrigerate overnight or for at least 8 hours until set.

Remove the cheesecake from the tin and transfer to a cake plate or stand and smooth the edges. Serve with pavlova topping.

Pavlova Topping

300ml thickened cream, whipped
10-12 mini meringues
2 small kiwi fruit, peeled and sliced
125g strawberries, halved
170g tin of passionfruit pulp in syrup

Spoon the cream over the cheesecake. Top with meringue and fruit pieces and drizzle with passionfruit syrup to serve.

And say hello to awesome-ness.

The great thing about this recipe is that you can change the topping up to suit your mood....

Think whipped cream with bananas and caramel sauce.....

Think whipped cream with macerated strawberries....

Think whipped cream, raspberries and white chocolate.....

The possibilities and flavour combinations are endless!

Oh and definitely think about sneaking spoonfuls of the leftovers straight out of the fridge for breakfast....


Enjoy!!

Mrs B xx

Sunday, August 25, 2013

Egg and Bacon Pie


The humble egg and bacon pie has been staring at me from the pages of my recipe folder for quite some time now. 

I always look at it with fond memories of the one my Mum used to make.....tell myself I really should make it one day.....and then promptly turn the page and move onto something else.

Well not this time! I finally decided it was time I (meaning Mr B) made our first egg and bacon pie....with a few minor twists on the original version.

My Mum used to make hers with mustard spread on the pastry base before adding the filling and I think that is a super awesome idea that admittedly I forgot to try this time, but will definitely be trying it next time because this recipe is a keeper - easy, tasty and filling - could you really ask for anything more??


Egg and Bacon Pie - Serves 4

2 tomatoes, thinly sliced and drained on a piece of paper towel to absorb excess moisture.
5 pieces short cut bacon diced
1 onion, diced
8 eggs
¼ cup milk
2 tablespoons chopped fresh thyme
2 sheets puff pastry
Extra 2 tablespoons milk

Heat a frying pan over medium-high heat and cook bacon and onion for 5 minutes or until browned. Transfer to a plate lined with paper towel.

Whisk 1 egg, milk and thyme together in a small bowl.

Preheat oven to 220°C (200°C fan-forced) and place a baking tray in the oven. Grease a 22cm pie tin and line base and sides with 1 sheet of pastry. Prick base all over with a fork.

Sprinkle half the bacon and onion mixture over the base. Top with tomato. Carefully break remaining eggs over tomato, try to keep the yolk in tact. Sprinkle over remaining bacon and onion. Pour thyme mixture on top, tapping base of pan to remove any air bubbles. Season with salt and pepper.

Place remaining pastry sheet over top. Roll up edge of overhanging pastry to seal your pie.

Brush with extra milk and pierce a small hole in the centre.

Place your pie dish on the hot tray in the oven and bake for 10 minutes.

Reduce oven temperature to 180°C (160°C fan-forced) and cook for a further 30 minutes or until pastry is golden and puffed. Stand for 10 minutes before serving with salad.


Enjoy!

Mrs B xx

LinkWithin

Related Posts Plugin for WordPress, Blogger...